

ROS-O で ROS1 を使う – ROS-O と ROS2 の併用
本シリーズ前回の記事「ROS-O で ROS1 を使う – パッケージのビルド」では ROS-O での ROS1 パッケージのビルドと実行について説明しました.
今回の記事では ros1_bridge を用いた ROS-O と ROS2 の併用方法について説明します.
本記事では対象とする Ubuntu のバージョンは次の2つとし,また ROS-O が既にインストールされている状態を前提としています.
- Ubuntu 22.04 + ROS-O
- Ubuntu 24.04 + ROS-O
ros1_bridge による ROS-O と ROS2 の併用
ROS-O と ROS2 を併用するには ROS1 と ROS2 間で通信を行うパッケージ ros1_bridge を利用します.
併用するための準備として ROS2 のインストールと ros1_bridge のビルドを行う必要があり,全体の手順は次のようになります.
- ROS2 のインストール
- ros1_bridge のビルド
- ROS-O / ROS2 併用システムの実行
以下に各手順の説明をします.
ROS2 のインストール
ROS-O がインストール済の Ubuntu PC に ROS2 パッケージをインストールします.ROS-O は Ubuntu のバージョンに非依存ですが ROS2 は Ubuntu のバージョンにそれぞれ対応したバージョンがあります.Ubuntu 22.04 であれば ROS 2 Humble,Ubuntu 24.04 であれば ROS 2 Jazzy をインストールします.
次のリストに ROS 2 Humble と ROS 2 Jazzy のインストール手順が記載されている Web ページへのリンクがありますので参照してインストールしてください.
- Ubuntu 22.04 → ROS 2 Humble
- Ubuntu 24.04 → ROS 2 Jazzy
以下に ROS 2 Jazzy のインストールコマンドを書き出したものを記します.ROS 2 Humble の場合は jazzy を humble に置き換えてください.
Terminal: ROS 2 Jazzy のインストール
locale
sudo apt update && sudo apt install locales
sudo locale-gen en_US en_US.UTF-8
sudo update-locale LC_ALL=en_US.UTF-8 LANG=en_US.UTF-8
export LANG=en_US.UTF-8
locale
sudo apt install software-properties-common
sudo add-apt-repository universe
sudo apt update && sudo apt install curl -y
export ROS_APT_SOURCE_VERSION=$(curl -s https://api.github.com/repos/ros-infrastructure/ros-apt-source/releases/latest | grep -F "tag_name" | awk -F'"' '{print $4}')
curl -L -o /tmp/ros2-apt-source.deb "https://github.com/ros-infrastructure/ros-apt-source/releases/download/${ROS_APT_SOURCE_VERSION}/ros2-apt-source_${ROS_APT_SOURCE_VERSION}.$(. /etc/os-release && echo ${UBUNTU_CODENAME:-${VERSION_CODENAME}})_all.deb"
sudo dpkg -i /tmp/ros2-apt-source.deb
sudo apt update
sudo apt upgrade
sudo apt install ros-jazzy-desktop
source /opt/ros/jazzy/setup.bash
ros1_bridge のビルド
ros1_bridge は ROS 2 Humble と ROS 2 Jazzy では apt でインストールできるパッケージとしては提供されていないため,ROS-O と ROS2 をインストールした Ubuntu PC 内に新たに ROS ワークスペースを作成してそこで ros1_bridge のソースコードを取得・ビルドして利用します.
この際 ros1_bridge 専用・単独のワークスペースを作成し,そこに git でソースコードを取得してビルド・実行することを強くおすすめします.
それをおすすめする理由は ros1_bridge 実行時のターミナル環境設定で ROS1(ROS-O)と ROS2 双方のソフトウェアへのパス(PATH)を通すため,そのターミナルで他の ROS1(ROS-O)や ROS2 パッケージもビルドや実行をしてしまうと,ROS1 と ROS2 のライブラリパスを混同してしまい ROS1 が ROS2 のもしくは ROS2 が ROS1 のライブラリを使おうとしてエラーになることを回避するためです.
以下の ROS-O + ROS 2 Jazzy の環境で ros1_bridge のビルドを行うコマンドの手順に従って実行します.ROS-O + ROS 2 Humble 環境の場合は jazzy を humble に置き換えてください.
Terminal: ros1_bridge のビルド
mkdir -p ~/bridge_ws/src
cd ~/bridge_ws/src
git clone https://github.com/ros2/ros1_bridge.git
source /opt/ros/one/setup.bash
source /opt/ros/jazzy/setup.bash
cd ~/bridge_ws
rosdep update
rosdep install --from-paths src --ignore-src -r -y
sudo apt install python3-colcon-common-extensions
colcon build --symlink-install --packages-select ros1_bridge --cmake-force-configure
最後の入力コマンド colcon build でビルドオプション --cmake-force-configure をつけているためビルド時間が数分〜十数分ほどかかります.これは ros1_bridge を構成するときに ROS 環境全体を解析して ROS-O / ROS2 それぞれにどのようなパッケージやメッセージ型,サービス型があるかなどを確認するために行っています.
以上で基本的な ROS-O / ROS2 併用システムの準備は終了です.
ROS-O / ROS2 併用システムの実行
ROS-O / ROS2 併用のための準備が整ったということで前回の記事で ROS-O パッケージのビルド例として用いた 光近接センサモジュール WrPPS Single Board の ROS1 パッケージ wrpps_ros を実行したときに発行されている ROS Topic を ros1_bridge を介して ROS2 からも購読できるか確かめてみます.
以降 光近接センサモジュール WrPPS Single Board はハードウェア的に正しく接続された状態にあるとして進めます.
下の「入力コマンド」は Ubuntu 24.04 + ROS-O + ROS 2 Jazzy 環境での実行コマンドを記しています.Ubuntu 22.04 + ROS-O + ROS 2 Humble の場合は jazzy のところを humble に置き換えて実行してください.
まず 1つ目のターミナルで ROS1(ROS-O) の環境設定を行い wrpps_ros を起動します.
Terminal 1: 入力コマンド(ROS-O パッケージ wrpps_ros の実行)
source ~/wrpps_ws/devel/setup.bash
roslaunch wrpps_ros wrpps_single_board.launch
次に 2つ目のターミナルで ROS1(ROS-O)と ROS2 双方の環境設定を行い ros1_bridge を実行します.
Terminal 2: 入力コマンド(ros1_bridge の実行)
source /opt/ros/one/setup.bash
source /opt/ros/jazzy/setup.bash
source ~/bridge_ws/install/setup.bash
ros2 run ros1_bridge dynamic_bridge --bridge-all-topics
最後に 3つ目のターミナルで ROS2 の環境設定を行い ros1_bridge を介して ROS1 側から送られてくる wrpps_ros のトピックを購読・出力します.
Terminal 3: 入力コマンド(ROS2 での ROS Topic 出力)
source /opt/ros/jazzy/setup.bash
ros2 topic list
ros2 topic echo /wrpps_single_board/driver/output/range_tof
Terminal 3: 出力例
robotuser@robotuser-PC:~$ source /opt/ros/jazzy/setup.bash
robotuser@robotuser-PC:~$ ros2 topic list
/diagnostics
/parameter_events
/rosout
/wrpps_single_board/driver/enable_intensity
/wrpps_single_board/driver/enable_tof
/wrpps_single_board/driver/got_enabling_command
/wrpps_single_board/driver/output/proximity_intensity/raw
/wrpps_single_board/driver/output/range_tof
/wrpps_single_board/driver/output/range_tof/raw
/wrpps_single_board/intensity_model_acquisition/output/range_combined
/wrpps_single_board/intensity_model_acquisition/output/range_intensity
/wrpps_single_board/range_low_pass_filter/output
robotuser@robotuser-PC:~$ ros2 topic echo /wrpps_single_board/driver/output/range_tof
header:
  stamp:
    sec: 1781165598
    nanosec: 426033496
  frame_id: wrpps_single_board_tof_frame
radiation_type: 1
field_of_view: 0.4399999976158142
min_range: 0.029999999329447746
max_range: 2.0
range: 0.06300000101327896
variance: 0.0
---
header:
  stamp:
    sec: 1781165598
    nanosec: 451354742
  frame_id: wrpps_single_board_tof_frame
radiation_type: 1
field_of_view: 0.4399999976158142
min_range: 0.029999999329447746
max_range: 2.0
range: 0.06400000303983688
variance: 0.0
---
header:
  stamp:
    sec: 1781165598
    nanosec: 474993467
  frame_id: wrpps_single_board_tof_frame
radiation_type: 1
field_of_view: 0.4399999976158142
min_range: 0.029999999329447746
max_range: 2.0
range: 0.06300000101327896
variance: 0.0
---

:
(以下略)
:
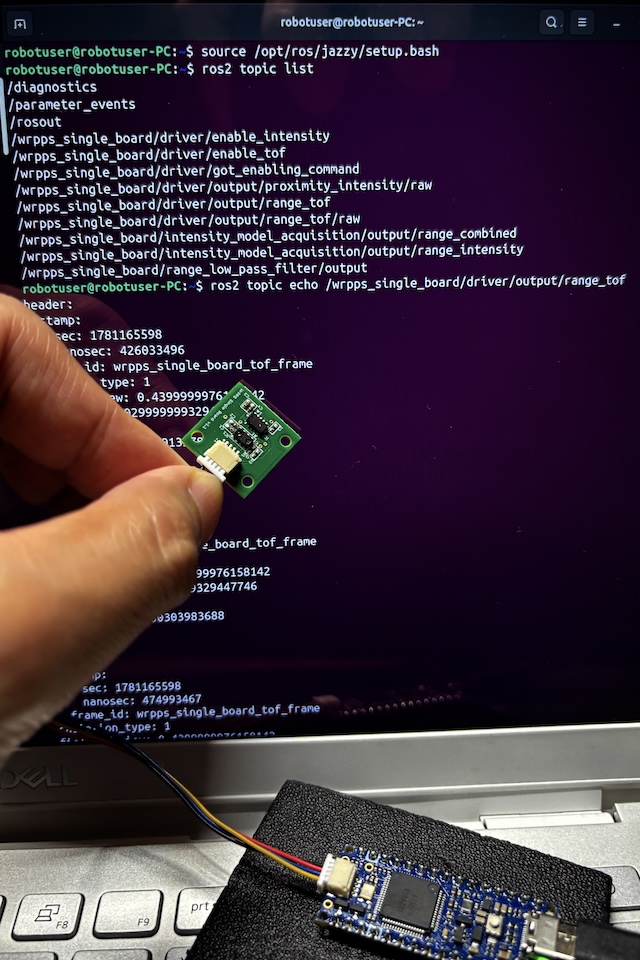 動作確認ができたら各ターミナルを
Ctrl-C で停止します.
このように基礎的なシステム構成ですが ros1_bridge を利用して ROS-O と ROS2 を併用している様子を見て取れたのではないかと思います.
今回の記事はここまでです.
本シリーズ次回の記事では ROS-O パッケージのネットワーク apt インストール対応
について説明する予定です.
ROS-O で ROS1 を使う – パッケージのビルド
本シリーズ前回の記事「ROS-O で ROS1 を使う – インストール」では ROS-O のインストール手順について説明しました.
今回の記事では ROS-O における ROS1 パッケージのビルドと実行について説明します.
本記事では Ubuntu のバージョンは次の2つとし,また ROS-O が既にインストールされている状態を前提としています.
- Ubuntu 22.04 + ROS-O
- Ubuntu 24.04 + ROS-O
ROS-O におけるパッケージのビルドと実行
ROS-O におけるビルドと実行と言っても基本的には従来の ROS1 と手順は同じです.
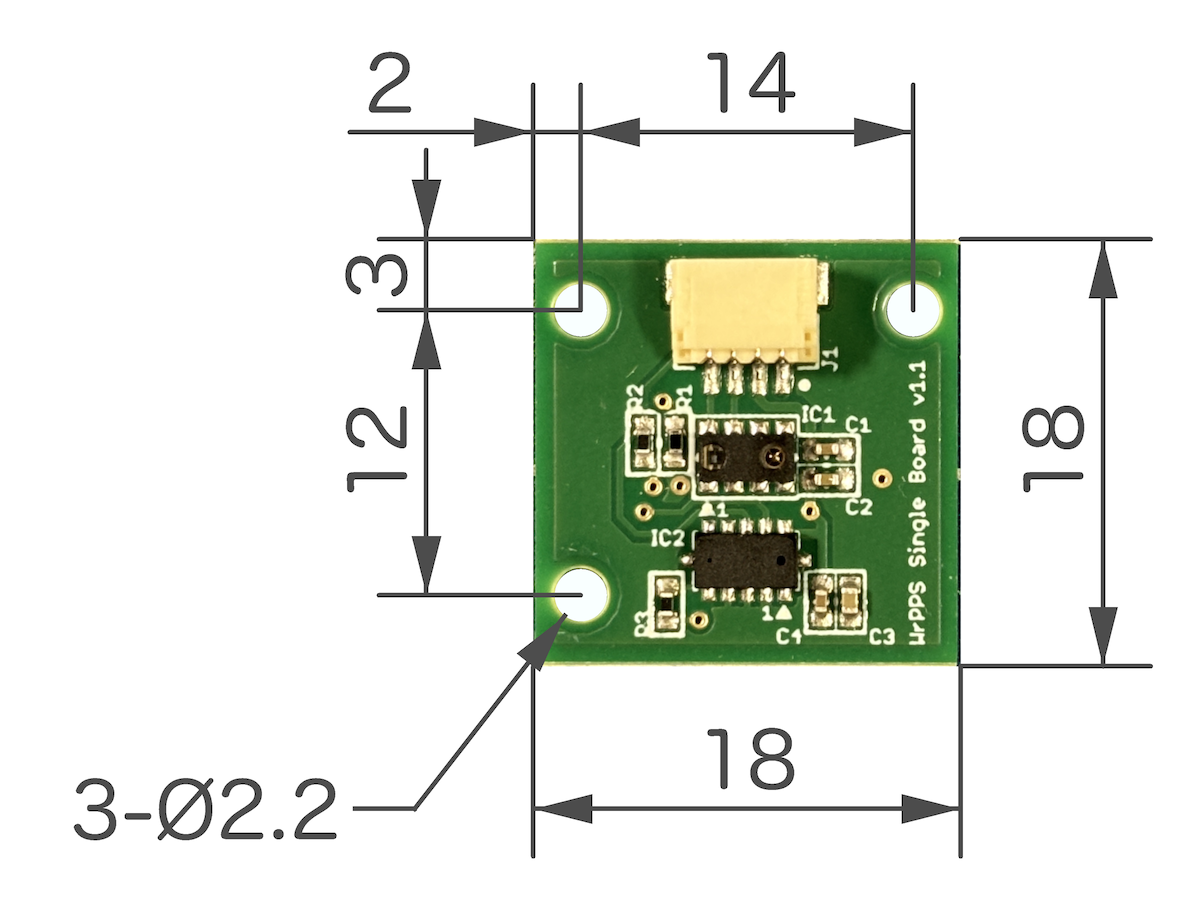 本記事では ROS-O におけるパッケージビルドを 光近接センサモジュール WrPPS Single Board の ROS1 パッケージ
 wrpps_ros を例に手順を追って行きます.
wrpps_ros は元々 Ubuntu 20.04 + ROS Noetic での動作を前提としていました.
Ubuntu 22.04 および 24.04 の ROS-O で動作確認したところソースコード自体の変更は必要なく,インストール手順で新しいバージョンの Ubuntu や ROS-O パッケージに対応したコマンド内パスの変更や 非ROS ソフトウェアパッケージの追加インストールが必要なだけでした.
これらの Ubuntu 22.04 および 24.04 と ROS-O におけるインストール手順の追記は既に wrpps_ros の README に反映されています.
Arduino IDE のセットアップとポストスクリプトの実行(非ROS)
インストール手順の内 ROS とは関係ない部分ですが Set up Arduino IDE の Arduino IDE ソフトウェアのインストール時に Ubuntu 22.04 と 24.04 での追加対応が必要な点がありました.
まず,Arduino IDE ソフトウェアをダウンロードします.
- Arduino – Software – Downloads
AppImage からインストールするための libfuse2 ライブラリをインストールします.ただし Ubuntu 24.04 の場合はライブラリ名が libfuse2t64 となります.
Terminal: Ubuntu 22.04 の場合
sudo apt install libfuse2
Terminal: Ubuntu 24.04 の場合
sudo apt install libfuse2t64
--no-sandbox オプションを付けて AppImage を実行してインストールします.
Terminal:
cd ~/Download
chmod a+x arduino-ide_2.3.8_Linux_64bit.AppImage
./arduino-ide_2.3.8_Linux_64bit.AppImage --no-sandbox
ポストインストールスクリプトを取得して実行します.
( Run Arduino Post Install Script – wrpps_ros )
Terminal:
cd ~/Download
chmod a+x post_install.sh
sudo ./post_install.sh
wrpps_ros ソースコードの取得とビルド
( Clone and Build wrpps_ros and FA-I-sensor packages – wrpps_ros )
ソースコードの取得とビルドに必要なパッケージ,git と catkin tools を apt でインストールします.
Terminal:
sudo apt install git python3-catkin-tools
ROS ワークスペースの作成してソースコードの取得とビルドを行います.
Terminal:
source /opt/ros/one/setup.bash
mkdir -p ~/wrpps_ws/src
cd ~/wrpps_ws/src
git clone https://github.com/tork-a/wrpps_ros.git
git clone https://github.com/RoboticMaterials/FA-I-sensor.git
cd ~/wrpps_ws
rosdep install -r -y --from-paths src --ignore-src
catkin build
source ~/wrpps_ws/devel/setup.bash
rosserial の Arduino ライブラリを取得作成します.
( Make rosserial Arduino Libraries – wrpps_ros )
Terminal:
sudo apt update
sudo apt install ros-one-rosserial-arduino
sudo apt install ros-one-rosserial
source ~/wrpps_ws/devel/setup.bash
cd ~/Arduino/libraries
rm -rf ros_lib
rosrun rosserial_arduino make_libraries.py .
WrPPS Single Board 用スケッチがアップロードされていいない Arduino の場合は Upload WrPPS Sketch to Arduino の手順で Arduino IDE ソフトウェアを利用してアップロードします.
ビルドした ROS パッケージの実行
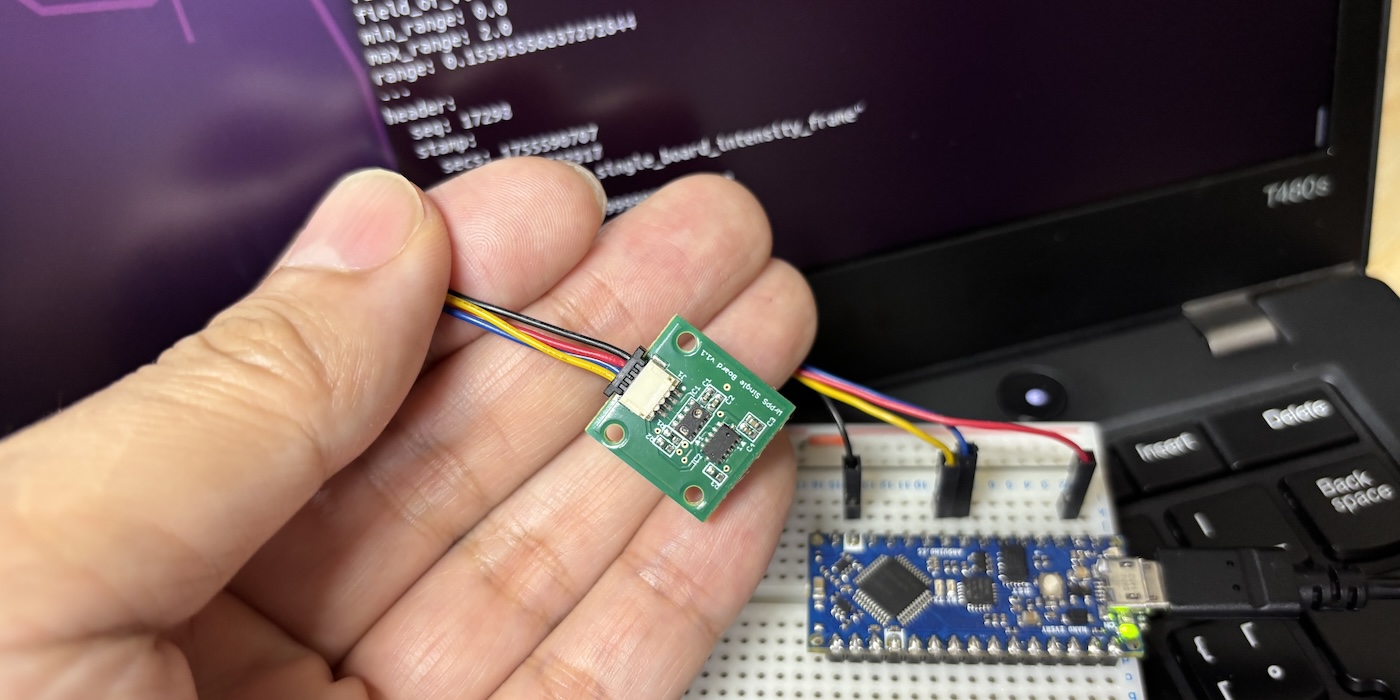
光近接センサモジュール WrPPS Single Board を対応 Arduino ボード経由で上記ビルドやインストールをした Ubuntu PC に接続します.本記事では Arduino WrPPS スケッチはアップロード済として進めます.
( Usage – wrpps_ros )
Terminal 1: 入力コマンド
source ~/wrpps_ws/devel/setup.bash
roslaunch wrpps_ros wrpps_single_board.launch
Terminal 2: 入力コマンド
source ~/wrpps_ws/devel/setup.bash
rostopic echo /wrpps_single_board/driver/output/range_tof
Terminal 2: 出力例(近接距離のトピック出力)
$ rostopic echo /wrpps_single_board/driver/output/range_tof
header:
  seq: 1015
  stamp:
    secs: 1754966728
    nsecs: 463486433
  frame_id: "wrpps_single_board_tof_frame"
radiation_type: 1
field_of_view: 0.4399999976158142
min_range: 0.029999999329447746
max_range: 2.0
range: 8.190999984741211
---

:
:
:

---
header:
  seq: 1223
  stamp:
    secs: 1754966733
    nsecs: 501786708
  frame_id: "wrpps_single_board_tof_frame"
radiation_type: 1
field_of_view: 0.4399999976158142
min_range: 0.029999999329447746
max_range: 2.0
range: 0.07100000232458115
---
header:
  seq: 1224
  stamp:
    secs: 1754966733
    nsecs: 526211977
  frame_id: "wrpps_single_board_tof_frame"
radiation_type: 1
field_of_view: 0.4399999976158142
min_range: 0.029999999329447746
max_range: 2.0
range: 0.07000000029802322
---
header:
  seq: 1225
  stamp:
    secs: 1754966733
    nsecs: 550466775
  frame_id: "wrpps_single_board_tof_frame"
radiation_type: 1
field_of_view: 0.4399999976158142
min_range: 0.029999999329447746
max_range: 2.0
range: 0.0689999982714653
---

:
:
:
動作確認できたら各ターミナルを Ctrl-C で停止します.
以上のように ROS-O を用いることで元々 Ubuntu 20.04 + ROS Noetic 向けだった wrpps_ros パッケージが新しい Ubuntu 22.04 や Ubuntu 24.04 でも利用できる様子を見ていただけたのではないかと思います.
ROS-O でのビルドと実行まとめ
- ROS-O でのパッケージのビルドと実行は基本的に ROS Kinetic 以前の操作と同じ
- ROS-O の環境設定
source /opt/ros/one/setup.bash - Ubuntu のバージョン違いで 非ROS のソフトウェアの対応が必要な場合がある
今回の記事はここまでです.
本シリーズ次回の記事では ros1_bridge を用いた ROS-O と ROS2 の併用方法について説明する予定です.
ROS-O で ROS1 を使う – インストール
本シリーズ前回の記事「ROS-O で ROS1 を使う – ROS-O とは」では ROS-O が必要とされる背景などを中心にその概要の説明をしました.
今回の記事では ROS-O のインストールとその動作確認の方法について説明します.本記事での ROS-O をインストールする対象の Ubuntu のバージョンは次の2つを前提としています.
- Ubuntu 22.04
- Ubuntu 24.04
ROS-O のインストール
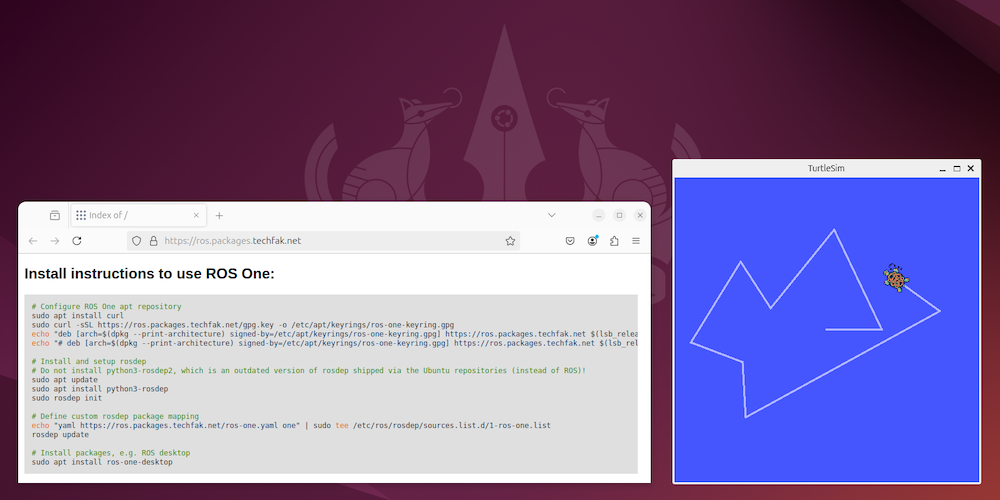
ROS-O のインストール手順は apt で取得できる ROS-O パッケージを配布している Web サイト Bielefeld University ROS-O package repository のトップページに
Install instructions to use ROS One: という項目で掲載されています.
Install instructions to use ROS One: のコメント以外,実行部分のみを書き出したものを下に掲載します.
インストールはターミナルに下のコマンドを1行ずつコピー&ペーストして [Enter] 入力で各コマンドを実行して行います.
- 注)1行が長く下記掲載の枠内に表示しきれない行もあるので枠内で右スクロールをして行末までコマンドをコピーするよう注意してください.
Terminal: ROS-O インストール
sudo apt install curl

sudo curl -sSL https://ros.packages.techfak.net/gpg.key -o /etc/apt/keyrings/ros-one-keyring.gpg

echo "deb [arch=$(dpkg --print-architecture) signed-by=/etc/apt/keyrings/ros-one-keyring.gpg] https://ros.packages.techfak.net $(lsb_release -cs) main" | sudo tee /etc/apt/sources.list.d/ros1.list

echo "# deb [arch=$(dpkg --print-architecture) signed-by=/etc/apt/keyrings/ros-one-keyring.gpg] https://ros.packages.techfak.net $(lsb_release -cs) main-dbg" | sudo tee -a /etc/apt/sources.list.d/ros1.list

sudo apt update

sudo apt install python3-rosdep

sudo rosdep init

echo "yaml https://ros.packages.techfak.net/ros-one.yaml one" | sudo tee /etc/ros/rosdep/sources.list.d/1-ros-one.list

rosdep update

sudo apt install ros-one-desktop
ROS-O の動作確認
ROS-O が動作するかを確認します.動作確認手順の1つとして ROS Noetic 以前と同様に「タートルシム / turtlesim」を Ubuntu PC 画面上で動かしてみます.
ROS Noetic 以前と基本操作は同じですが,異なる点が1つあり,ターミナルの ROS 環境の設定が ROS-O となるように source /opt/ros/one/setup.bash を実行します.
Terminal 1: 入力コマンド roscore
source /opt/ros/one/setup.bash
roscore
Terminal 1: 出力例
robotuser@robotuser-PC:~$ source /opt/ros/one/setup.bash
robotuser@robotuser-PC:~$ roscore
... logging to /home/robotuser/.ros/log/96e7dc35-4f5d-11f1-b266-50eb713af63d/roslaunch-robotuser-PC-5625.log
Checking log directory for disk usage. This may take a while.
Press Ctrl-C to interrupt
Done checking log file disk usage. Usage is <1GB.

started roslaunch server http://robotuser-PC:43503/
ros_comm version 1.17.3


SUMMARY
========

PARAMETERS
 * /rosdistro: one
 * /rosversion: 1.17.3

NODES

auto-starting new master
process[master]: started with pid [5633]
ROS_MASTER_URI=http://robotuser-PC:11311/

setting /run_id to 96e7dc35-4f5d-11f1-b266-50eb713af63d
process[rosout-1]: started with pid [5642]
started core service [/rosout]
Terminal 2: 入力コマンド turtlesim_node
source /opt/ros/one/setup.bash
rosrun turtlesim turtlesim_node
Terminal 2: 出力例
robotuser@robotuser-PC:~$ source /opt/ros/one/setup.bash
robotuser@robotuser-PC:~$ rosrun turtlesim turtlesim_node
QSocketNotifier: Can only be used with threads started with QThread
[INFO] [1778739996.107534065]: Starting turtlesim with node name /turtlesim
[INFO] [1778739996.111756257]: Spawning turtle [turtle1] at x=[5.544445], y=[5.544445], theta=[0.000000]
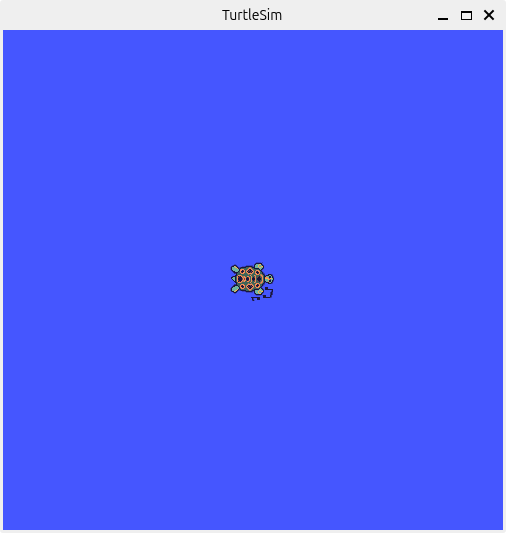
turtlesim_node が正常起動すると左図のような中心に亀が表示されたウィンドウが開きます.
Terminal 3: 入力コマンド turtle_teleop_key
source /opt/ros/one/setup.bash
rosrun turtlesim turtle_teleop_key
Terminal 3: 出力例
robotuser@robotuser-PC:~$ source /opt/ros/one/setup.bash
robotuser@robotuser-PC:~$ rosrun turtlesim turtle_teleop_key
Reading from keyboard
---------------------------
Use arrow keys to move the turtle. 'q' to quit.
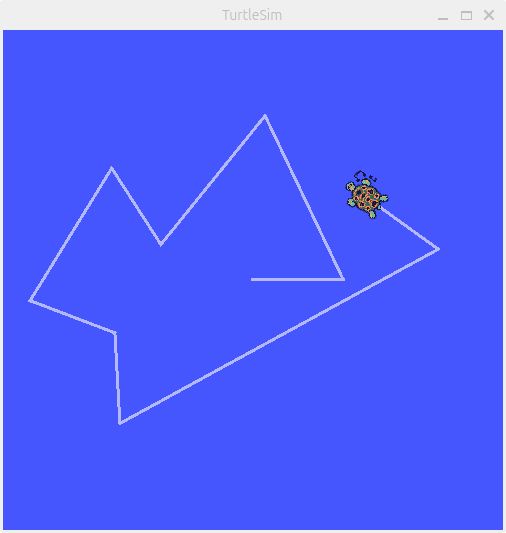
turtle_teleop_key を起動した状態でキーボードの方向キー(←↑↓→)を押すと turtlesim_node で表示しているウィンドウの中の亀がウィンドウ内で動くかと思います.
亀がキー操作で動いたらとりあえずの ROS-O の動作確認は終了です.
Terminal 3 は ‘q’ で,Terminal 1 と 2 は ‘Ctrl-C’ で終了します.
今回の記事はここまでです.
本シリーズ次回の記事では ROS-O での ROS パッケージのビルドとその実行について説明する予定です.