
ROS-O で ROS1 を使う – ROS-O と ROS2 の併用
本シリーズ前回の記事「ROS-O で ROS1 を使う – パッケージのビルド」では ROS-O での ROS1 パッケージのビルドと実行について説明しました.
今回の記事では ros1_bridge を用いた ROS-O と ROS2 の併用方法について説明します.
本記事では対象とする Ubuntu のバージョンは次の2つとし,また ROS-O が既にインストールされている状態を前提としています.
- Ubuntu 22.04 + ROS-O
- Ubuntu 24.04 + ROS-O
ros1_bridge による ROS-O と ROS2 の併用
ROS-O と ROS2 を併用するには ROS1 と ROS2 間で通信を行うパッケージ ros1_bridge を利用します.
併用するための準備として ROS2 のインストールと ros1_bridge のビルドを行う必要があり,全体の手順は次のようになります.
- ROS2 のインストール
- ros1_bridge のビルド
- ROS-O / ROS2 併用システムの実行
以下に各手順の説明をします.
ROS2 のインストール
ROS-O がインストール済の Ubuntu PC に ROS2 パッケージをインストールします.ROS-O は Ubuntu のバージョンに非依存ですが ROS2 は Ubuntu のバージョンにそれぞれ対応したバージョンがあります.Ubuntu 22.04 であれば ROS 2 Humble,Ubuntu 24.04 であれば ROS 2 Jazzy をインストールします.
次のリストに ROS 2 Humble と ROS 2 Jazzy のインストール手順が記載されている Web ページへのリンクがありますので参照してインストールしてください.
- Ubuntu 22.04 → ROS 2 Humble
- Ubuntu 24.04 → ROS 2 Jazzy
以下に ROS 2 Jazzy のインストールコマンドを書き出したものを記します.ROS 2 Humble の場合は jazzy を humble に置き換えてください.
Terminal: ROS 2 Jazzy のインストール
locale
sudo apt update && sudo apt install locales
sudo locale-gen en_US en_US.UTF-8
sudo update-locale LC_ALL=en_US.UTF-8 LANG=en_US.UTF-8
export LANG=en_US.UTF-8
locale
sudo apt install software-properties-common
sudo add-apt-repository universe
sudo apt update && sudo apt install curl -y
export ROS_APT_SOURCE_VERSION=$(curl -s https://api.github.com/repos/ros-infrastructure/ros-apt-source/releases/latest | grep -F "tag_name" | awk -F'"' '{print $4}')
curl -L -o /tmp/ros2-apt-source.deb "https://github.com/ros-infrastructure/ros-apt-source/releases/download/${ROS_APT_SOURCE_VERSION}/ros2-apt-source_${ROS_APT_SOURCE_VERSION}.$(. /etc/os-release && echo ${UBUNTU_CODENAME:-${VERSION_CODENAME}})_all.deb"
sudo dpkg -i /tmp/ros2-apt-source.deb
sudo apt update
sudo apt upgrade
sudo apt install ros-jazzy-desktop
source /opt/ros/jazzy/setup.bash
ros1_bridge のビルド
ros1_bridge は ROS 2 Humble と ROS 2 Jazzy では apt でインストールできるパッケージとしては提供されていないため,ROS-O と ROS2 をインストールした Ubuntu PC 内に新たに ROS ワークスペースを作成してそこで ros1_bridge のソースコードを取得・ビルドして利用します.
この際 ros1_bridge 専用・単独のワークスペースを作成し,そこに git でソースコードを取得してビルド・実行することを強くおすすめします.
それをおすすめする理由は ros1_bridge 実行時のターミナル環境設定で ROS1(ROS-O)と ROS2 双方のソフトウェアへのパス(PATH)を通すため,そのターミナルで他の ROS1(ROS-O)や ROS2 パッケージもビルドや実行をしてしまうと,ROS1 と ROS2 のライブラリパスを混同してしまい ROS1 が ROS2 のもしくは ROS2 が ROS1 のライブラリを使おうとしてエラーになることを回避するためです.
以下の ROS-O + ROS 2 Jazzy の環境で ros1_bridge のビルドを行うコマンドの手順に従って実行します.ROS-O + ROS 2 Humble 環境の場合は jazzy を humble に置き換えてください.
Terminal: ros1_bridge のビルド
mkdir -p ~/bridge_ws/src
cd ~/bridge_ws/src
git clone https://github.com/ros2/ros1_bridge.git
source /opt/ros/one/setup.bash
source /opt/ros/jazzy/setup.bash
cd ~/bridge_ws
rosdep update
rosdep install --from-paths src --ignore-src -r -y
sudo apt install python3-colcon-common-extensions
colcon build --symlink-install --packages-select ros1_bridge --cmake-force-configure
最後の入力コマンド colcon build でビルドオプション --cmake-force-configure をつけているためビルド時間が数分〜十数分ほどかかります.これは ros1_bridge を構成するときに ROS 環境全体を解析して ROS-O / ROS2 それぞれにどのようなパッケージやメッセージ型,サービス型があるかなどを確認するために行っています.
以上で基本的な ROS-O / ROS2 併用システムの準備は終了です.
ROS-O / ROS2 併用システムの実行
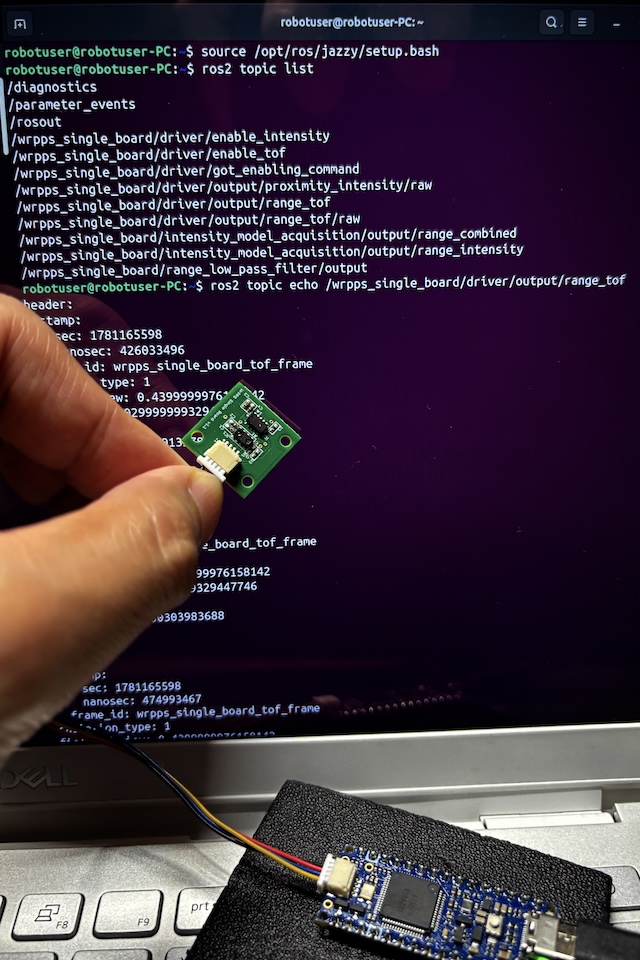
ROS-O / ROS2 併用のための準備が整ったということで前回の記事で ROS-O パッケージのビルド例として用いた 光近接センサモジュール WrPPS Single Board の ROS1 パッケージ wrpps_ros を実行したときに発行されている ROS Topic を ros1_bridge を介して ROS2 からも購読できるか確かめてみます.
以降 光近接センサモジュール WrPPS Single Board はハードウェア的に正しく接続された状態にあるとして進めます.
下の「入力コマンド」は Ubuntu 24.04 + ROS-O + ROS 2 Jazzy 環境での実行コマンドを記しています.Ubuntu 22.04 + ROS-O + ROS 2 Humble の場合は jazzy のところを humble に置き換えて実行してください.
まず 1つ目のターミナルで ROS1(ROS-O) の環境設定を行い wrpps_ros を起動します.
Terminal 1: 入力コマンド(ROS-O パッケージ wrpps_ros の実行)
source ~/wrpps_ws/devel/setup.bash
roslaunch wrpps_ros wrpps_single_board.launch
次に 2つ目のターミナルで ROS1(ROS-O)と ROS2 双方の環境設定を行い ros1_bridge を実行します.
Terminal 2: 入力コマンド(ros1_bridge の実行)
source /opt/ros/one/setup.bash
source /opt/ros/jazzy/setup.bash
source ~/bridge_ws/install/setup.bash
ros2 run ros1_bridge dynamic_bridge --bridge-all-topics
最後に 3つ目のターミナルで ROS2 の環境設定を行い ros1_bridge を介して ROS1 側から送られてくる wrpps_ros のトピックを購読・出力します.
Terminal 3: 入力コマンド(ROS2 での ROS Topic 出力)
source /opt/ros/jazzy/setup.bash
ros2 topic list
ros2 topic echo /wrpps_single_board/driver/output/range_tof
Terminal 3: 出力例
robotuser@robotuser-PC:~$ source /opt/ros/jazzy/setup.bash
robotuser@robotuser-PC:~$ ros2 topic list
/diagnostics
/parameter_events
/rosout
/wrpps_single_board/driver/enable_intensity
/wrpps_single_board/driver/enable_tof
/wrpps_single_board/driver/got_enabling_command
/wrpps_single_board/driver/output/proximity_intensity/raw
/wrpps_single_board/driver/output/range_tof
/wrpps_single_board/driver/output/range_tof/raw
/wrpps_single_board/intensity_model_acquisition/output/range_combined
/wrpps_single_board/intensity_model_acquisition/output/range_intensity
/wrpps_single_board/range_low_pass_filter/output
robotuser@robotuser-PC:~$ ros2 topic echo /wrpps_single_board/driver/output/range_tof
header:
  stamp:
    sec: 1781165598
    nanosec: 426033496
  frame_id: wrpps_single_board_tof_frame
radiation_type: 1
field_of_view: 0.4399999976158142
min_range: 0.029999999329447746
max_range: 2.0
range: 0.06300000101327896
variance: 0.0
---
header:
  stamp:
    sec: 1781165598
    nanosec: 451354742
  frame_id: wrpps_single_board_tof_frame
radiation_type: 1
field_of_view: 0.4399999976158142
min_range: 0.029999999329447746
max_range: 2.0
range: 0.06400000303983688
variance: 0.0
---
header:
  stamp:
    sec: 1781165598
    nanosec: 474993467
  frame_id: wrpps_single_board_tof_frame
radiation_type: 1
field_of_view: 0.4399999976158142
min_range: 0.029999999329447746
max_range: 2.0
range: 0.06300000101327896
variance: 0.0
---

:
(以下略)
:
 動作確認ができたら各ターミナルを
Ctrl-C で停止します.
このように基礎的なシステム構成ですが ros1_bridge を利用して ROS-O と ROS2 を併用している様子を見て取れたのではないかと思います.
今回の記事はここまでです.
本シリーズ次回の記事では ROS-O パッケージのネットワーク apt インストール対応
について説明する予定です.
ROS-O で ROS1 を使う – パッケージのビルド
本シリーズ前回の記事「ROS-O で ROS1 を使う – インストール」では ROS-O のインストール手順について説明しました.
今回の記事では ROS-O における ROS1 パッケージのビルドと実行について説明します.
本記事では Ubuntu のバージョンは次の2つとし,また ROS-O が既にインストールされている状態を前提としています.
- Ubuntu 22.04 + ROS-O
- Ubuntu 24.04 + ROS-O
ROS-O におけるパッケージのビルドと実行
ROS-O におけるビルドと実行と言っても基本的には従来の ROS1 と手順は同じです.
 本記事では ROS-O におけるパッケージビルドを 光近接センサモジュール WrPPS Single Board の ROS1 パッケージ
 wrpps_ros を例に手順を追って行きます.
wrpps_ros は元々 Ubuntu 20.04 + ROS Noetic での動作を前提としていました.
Ubuntu 22.04 および 24.04 の ROS-O で動作確認したところソースコード自体の変更は必要なく,インストール手順で新しいバージョンの Ubuntu や ROS-O パッケージに対応したコマンド内パスの変更や 非ROS ソフトウェアパッケージの追加インストールが必要なだけでした.
これらの Ubuntu 22.04 および 24.04 と ROS-O におけるインストール手順の追記は既に wrpps_ros の README に反映されています.
Arduino IDE のセットアップとポストスクリプトの実行(非ROS)
インストール手順の内 ROS とは関係ない部分ですが Set up Arduino IDE の Arduino IDE ソフトウェアのインストール時に Ubuntu 22.04 と 24.04 での追加対応が必要な点がありました.
まず,Arduino IDE ソフトウェアをダウンロードします.
- Arduino – Software – Downloads
AppImage からインストールするための libfuse2 ライブラリをインストールします.ただし Ubuntu 24.04 の場合はライブラリ名が libfuse2t64 となります.
Terminal: Ubuntu 22.04 の場合
sudo apt install libfuse2
Terminal: Ubuntu 24.04 の場合
sudo apt install libfuse2t64
--no-sandbox オプションを付けて AppImage を実行してインストールします.
Terminal:
cd ~/Download
chmod a+x arduino-ide_2.3.8_Linux_64bit.AppImage
./arduino-ide_2.3.8_Linux_64bit.AppImage --no-sandbox
ポストインストールスクリプトを取得して実行します.
( Run Arduino Post Install Script – wrpps_ros )
Terminal:
cd ~/Download
chmod a+x post_install.sh
sudo ./post_install.sh
wrpps_ros ソースコードの取得とビルド
( Clone and Build wrpps_ros and FA-I-sensor packages – wrpps_ros )
ソースコードの取得とビルドに必要なパッケージ,git と catkin tools を apt でインストールします.
Terminal:
sudo apt install git python3-catkin-tools
ROS ワークスペースの作成してソースコードの取得とビルドを行います.
Terminal:
source /opt/ros/one/setup.bash
mkdir -p ~/wrpps_ws/src
cd ~/wrpps_ws/src
git clone https://github.com/tork-a/wrpps_ros.git
git clone https://github.com/RoboticMaterials/FA-I-sensor.git
cd ~/wrpps_ws
rosdep install -r -y --from-paths src --ignore-src
catkin build
source ~/wrpps_ws/devel/setup.bash
rosserial の Arduino ライブラリを取得作成します.
( Make rosserial Arduino Libraries – wrpps_ros )
Terminal:
sudo apt update
sudo apt install ros-one-rosserial-arduino
sudo apt install ros-one-rosserial
source ~/wrpps_ws/devel/setup.bash
cd ~/Arduino/libraries
rm -rf ros_lib
rosrun rosserial_arduino make_libraries.py .
WrPPS Single Board 用スケッチがアップロードされていいない Arduino の場合は Upload WrPPS Sketch to Arduino の手順で Arduino IDE ソフトウェアを利用してアップロードします.
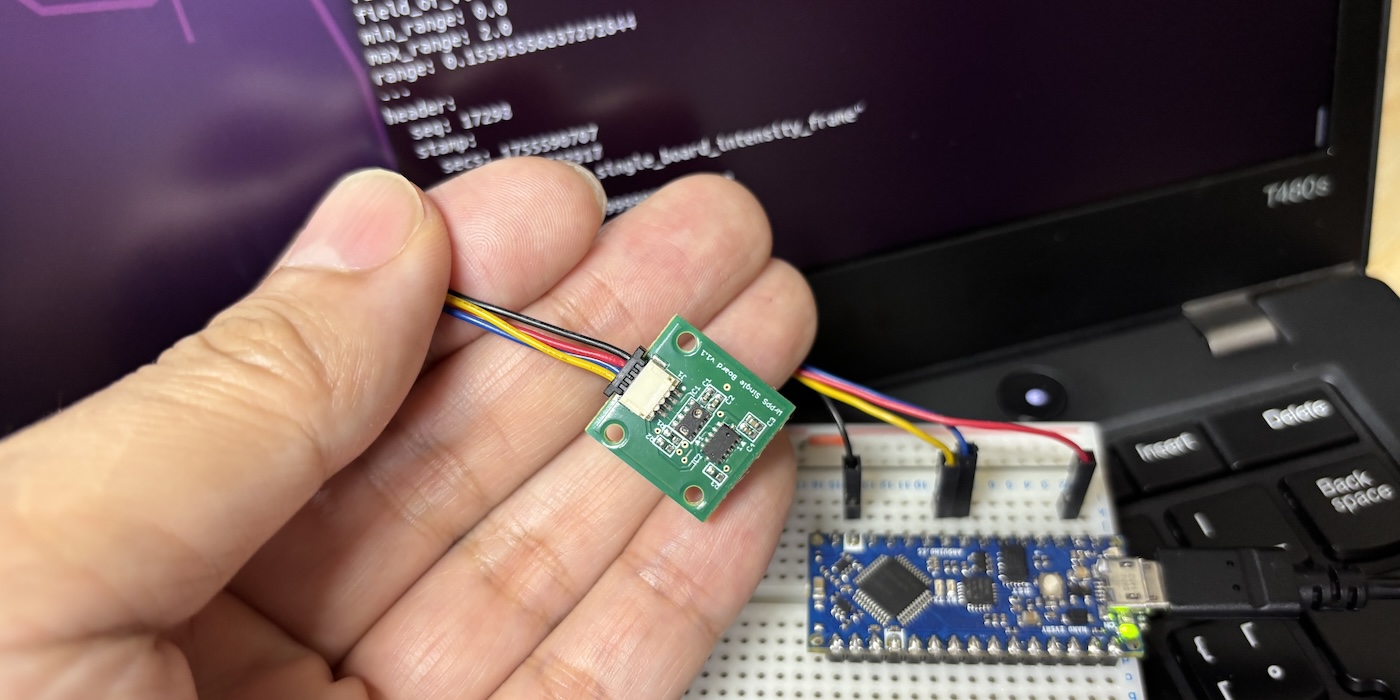
ビルドした ROS パッケージの実行
光近接センサモジュール WrPPS Single Board を対応 Arduino ボード経由で上記ビルドやインストールをした Ubuntu PC に接続します.本記事では Arduino WrPPS スケッチはアップロード済として進めます.
( Usage – wrpps_ros )
Terminal 1: 入力コマンド
source ~/wrpps_ws/devel/setup.bash
roslaunch wrpps_ros wrpps_single_board.launch
Terminal 2: 入力コマンド
source ~/wrpps_ws/devel/setup.bash
rostopic echo /wrpps_single_board/driver/output/range_tof
Terminal 2: 出力例(近接距離のトピック出力)
$ rostopic echo /wrpps_single_board/driver/output/range_tof
header:
  seq: 1015
  stamp:
    secs: 1754966728
    nsecs: 463486433
  frame_id: "wrpps_single_board_tof_frame"
radiation_type: 1
field_of_view: 0.4399999976158142
min_range: 0.029999999329447746
max_range: 2.0
range: 8.190999984741211
---

:
:
:

---
header:
  seq: 1223
  stamp:
    secs: 1754966733
    nsecs: 501786708
  frame_id: "wrpps_single_board_tof_frame"
radiation_type: 1
field_of_view: 0.4399999976158142
min_range: 0.029999999329447746
max_range: 2.0
range: 0.07100000232458115
---
header:
  seq: 1224
  stamp:
    secs: 1754966733
    nsecs: 526211977
  frame_id: "wrpps_single_board_tof_frame"
radiation_type: 1
field_of_view: 0.4399999976158142
min_range: 0.029999999329447746
max_range: 2.0
range: 0.07000000029802322
---
header:
  seq: 1225
  stamp:
    secs: 1754966733
    nsecs: 550466775
  frame_id: "wrpps_single_board_tof_frame"
radiation_type: 1
field_of_view: 0.4399999976158142
min_range: 0.029999999329447746
max_range: 2.0
range: 0.0689999982714653
---

:
:
:
動作確認できたら各ターミナルを Ctrl-C で停止します.
以上のように ROS-O を用いることで元々 Ubuntu 20.04 + ROS Noetic 向けだった wrpps_ros パッケージが新しい Ubuntu 22.04 や Ubuntu 24.04 でも利用できる様子を見ていただけたのではないかと思います.
ROS-O でのビルドと実行まとめ
- ROS-O でのパッケージのビルドと実行は基本的に ROS Kinetic 以前の操作と同じ
- ROS-O の環境設定
source /opt/ros/one/setup.bash - Ubuntu のバージョン違いで 非ROS のソフトウェアの対応が必要な場合がある
今回の記事はここまでです.
本シリーズ次回の記事では ros1_bridge を用いた ROS-O と ROS2 の併用方法について説明する予定です.

ROS-O で ROS1 を使う – インストール
本シリーズ前回の記事「ROS-O で ROS1 を使う – ROS-O とは」では ROS-O が必要とされる背景などを中心にその概要の説明をしました.
今回の記事では ROS-O のインストールとその動作確認の方法について説明します.本記事での ROS-O をインストールする対象の Ubuntu のバージョンは次の2つを前提としています.
- Ubuntu 22.04
- Ubuntu 24.04
ROS-O のインストール
ROS-O のインストール手順は apt で取得できる ROS-O パッケージを配布している Web サイト Bielefeld University ROS-O package repository のトップページに
Install instructions to use ROS One: という項目で掲載されています.
Install instructions to use ROS One: のコメント以外,実行部分のみを書き出したものを下に掲載します.
インストールはターミナルに下のコマンドを1行ずつコピー&ペーストして [Enter] 入力で各コマンドを実行して行います.
- 注)1行が長く下記掲載の枠内に表示しきれない行もあるので枠内で右スクロールをして行末までコマンドをコピーするよう注意してください.
Terminal: ROS-O インストール
sudo apt install curl

sudo curl -sSL https://ros.packages.techfak.net/gpg.key -o /etc/apt/keyrings/ros-one-keyring.gpg

echo "deb [arch=$(dpkg --print-architecture) signed-by=/etc/apt/keyrings/ros-one-keyring.gpg] https://ros.packages.techfak.net $(lsb_release -cs) main" | sudo tee /etc/apt/sources.list.d/ros1.list

echo "# deb [arch=$(dpkg --print-architecture) signed-by=/etc/apt/keyrings/ros-one-keyring.gpg] https://ros.packages.techfak.net $(lsb_release -cs) main-dbg" | sudo tee -a /etc/apt/sources.list.d/ros1.list

sudo apt update

sudo apt install python3-rosdep

sudo rosdep init

echo "yaml https://ros.packages.techfak.net/ros-one.yaml one" | sudo tee /etc/ros/rosdep/sources.list.d/1-ros-one.list

rosdep update

sudo apt install ros-one-desktop
ROS-O の動作確認
ROS-O が動作するかを確認します.動作確認手順の1つとして ROS Noetic 以前と同様に「タートルシム / turtlesim」を Ubuntu PC 画面上で動かしてみます.
ROS Noetic 以前と基本操作は同じですが,異なる点が1つあり,ターミナルの ROS 環境の設定が ROS-O となるように source /opt/ros/one/setup.bash を実行します.
Terminal 1: 入力コマンド roscore
source /opt/ros/one/setup.bash
roscore
Terminal 1: 出力例
robotuser@robotuser-PC:~$ source /opt/ros/one/setup.bash
robotuser@robotuser-PC:~$ roscore
... logging to /home/robotuser/.ros/log/96e7dc35-4f5d-11f1-b266-50eb713af63d/roslaunch-robotuser-PC-5625.log
Checking log directory for disk usage. This may take a while.
Press Ctrl-C to interrupt
Done checking log file disk usage. Usage is <1GB.

started roslaunch server http://robotuser-PC:43503/
ros_comm version 1.17.3


SUMMARY
========

PARAMETERS
 * /rosdistro: one
 * /rosversion: 1.17.3

NODES

auto-starting new master
process[master]: started with pid [5633]
ROS_MASTER_URI=http://robotuser-PC:11311/

setting /run_id to 96e7dc35-4f5d-11f1-b266-50eb713af63d
process[rosout-1]: started with pid [5642]
started core service [/rosout]
Terminal 2: 入力コマンド turtlesim_node
source /opt/ros/one/setup.bash
rosrun turtlesim turtlesim_node
Terminal 2: 出力例
robotuser@robotuser-PC:~$ source /opt/ros/one/setup.bash
robotuser@robotuser-PC:~$ rosrun turtlesim turtlesim_node
QSocketNotifier: Can only be used with threads started with QThread
[INFO] [1778739996.107534065]: Starting turtlesim with node name /turtlesim
[INFO] [1778739996.111756257]: Spawning turtle [turtle1] at x=[5.544445], y=[5.544445], theta=[0.000000]
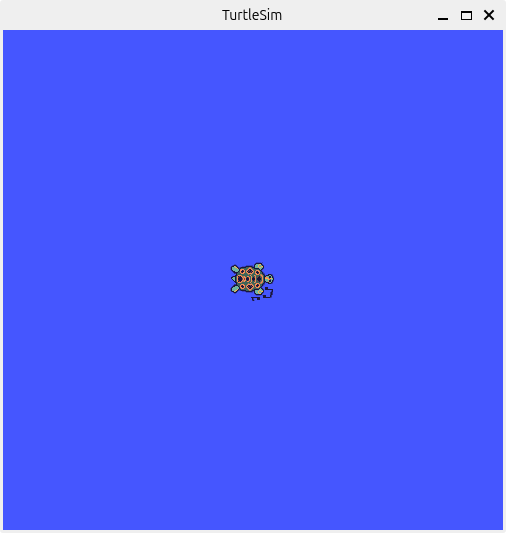
turtlesim_node が正常起動すると左図のような中心に亀が表示されたウィンドウが開きます.
Terminal 3: 入力コマンド turtle_teleop_key
source /opt/ros/one/setup.bash
rosrun turtlesim turtle_teleop_key
Terminal 3: 出力例
robotuser@robotuser-PC:~$ source /opt/ros/one/setup.bash
robotuser@robotuser-PC:~$ rosrun turtlesim turtle_teleop_key
Reading from keyboard
---------------------------
Use arrow keys to move the turtle. 'q' to quit.
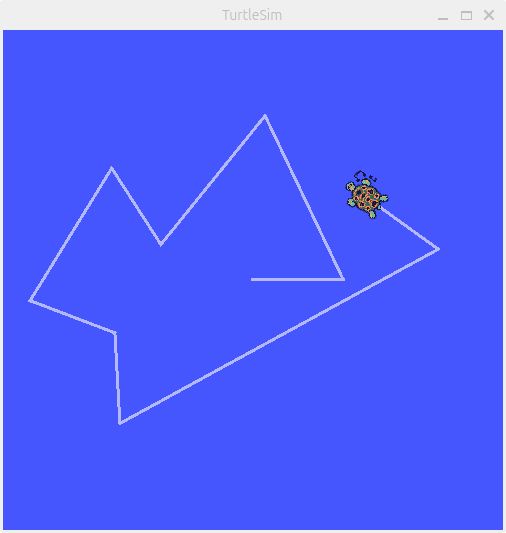
turtle_teleop_key を起動した状態でキーボードの方向キー(←↑↓→)を押すと turtlesim_node で表示しているウィンドウの中の亀がウィンドウ内で動くかと思います.
亀がキー操作で動いたらとりあえずの ROS-O の動作確認は終了です.
Terminal 3 は ‘q’ で,Terminal 1 と 2 は ‘Ctrl-C’ で終了します.
今回の記事はここまでです.
本シリーズ次回の記事では ROS-O での ROS パッケージのビルドとその実行について説明する予定です.

ROS-O で ROS1 を使う – ROS-O とは
ROS1 は最後の公式なバージョン ROS Noetic のサポートが 2025年5月 に終了(End of Life / EOL)し,ROS2 への移行が進みつつあります.
ROS2 が普及しつつあるとは言え,ROS1 で構成されたロボット資産をまだ有効活用したいこともまだあるかと思います.そのようなケースに対応するため,有志によるコミュニティ主導のプロジェクト ROS-O(ロスオー,ROS One)でサポートが終了した後の新しい Ubuntu 環境においても ROS1 を使えるように維持・管理が行われています.
今回は ROS-O で ROS1 を使う方法について次のように何回かの記事に分けて説明する予定です.
- ROS-O とは (←今回の記事)
- ROS-O のインストール
- ROS-O パッケージのソースビルド
- ROS-O と ROS2 の併用
- ROS-O パッケージのネットワーク apt インストール対応
ROS-O とは
ROS-O(ロスオー,ROS One)は ROS1 の公式最終バージョン ROS Noetic サポート終了後も,より新しい Ubuntu 環境で ROS1 系ソフトウェアを継続利用できるようにするためのコミュニティ主導プロジェクトです.
ROS1 が公式には 2025年5月 に EOL(End of Life)となり Ubuntu 20.04 にて公式対応が終了しました.その結果 Ubuntu 22.04 や 24.04 上で ROS1 のソフトウェアパッケージを apt install などにより簡単に利用することが難しくなりました.
- ROS1 公式サポートの終了
- 2025年5月
- 最終対応 Ubuntu: 20.04
- 最終バージョン: ROS Noetic
そうのような状況の中で ROS-O では多くの資産が残っている ROS1 ソフトウェアやそのハードウェアをより新しいバージョンの Ubuntu 上でも活用できるよう修正や保守が行われています.
具体的には ROS-O で ROS1 のコアパッケージの主要なリポジトリをフォークし,バグ修正や最新のコンパイラへの対応を一括して引き受ける受け皿として機能しています.また,新しい Python バージョンや C++ 標準,依存ライブラリの変化に伴って従来の ROS1 コードはビルドできなくなることが増えていることに対して ROS-O プロジェクトにて有志によりこれらの変更に追従するための修正が継続的に行われています.
新しい Ubuntu バージョンでの ROS1 資産の活用
ROS-O の重要な要素でもあるのが新しい Ubuntu バージョンでの ROS1 資産の活用です.公式最終バージョンの ROS1 である ROS Noetic は Ubuntu 20.04 での利用が前提でしたが,ROS-O は ROS Noetic が公式にサポートしていた Ubuntu 20.04 よりも新しいバージョンの Ubuntu にも対応するようメンテナンスされています.
- ROS-O が対応している Ubuntu(2026年5月時点)
- Ubuntu 22.04
- Ubuntu 24.04
これらの Ubuntu バージョンにおいて ROS-O は ros-one-* パッケージを apt インストールできる状態で提供しています.
- https://ros.packages.techfak.net/ros-one.yaml
- ros-one-desktop
- ros-one-tf2-ros
このように Ubuntu 20.04 以前の古いシステムを維持しなくても ROS1 を動かせることにより,研究・教育・産業の各分野にある ROS1 の大きな資産を継続的に利用することができます.
- ROS1 資産の例
- 古いロボット
- 学術コード
- センサドライバ
例えば特定のロボットやセンサーのドライバが ROS1 にしか対応しておらず,メーカーのサポートも終了しているような場合でも ROS-O を活用することで新しいシステム内で既存のハードウェアを利用できる可能性があります.
ROS-O 併用による段階的な ROS2 移行
ROS2 の普及が進みつつありますが ROS1 から完全移行するにも一部のパッケージが対応されていないような状況はまだあるものと考えられます.ROS-O により新しいバージョンの Ubuntu 上でも ROS1 と ROS2 を併用したシステムを運用しやすくなります.
- ROS-O と ros1_bridge による ROS1 + ROS2 併用
- ROS1 ドライバ
- ros1_bridge
- ROS2 Navigation
開発者自身のソフトウェアパッケージについても ROS1 パッケージから ROS2 への移植は簡単な場合も多いですが,一部においては ROS1 から ROS2 へのアーキテクチャなどの変更が大きく影響して移植コストが高くなってしまうケースがあります.その場合は既存の ROS1 パッケージを暫定的に ROS-O で運用し,より優先度の高いソフトウェア開発に注力してから順次 ROS1 パッケージの ROS2 移植を進めることができます.
注意点・限界
ROS-O はいくつか注意して利用する必要があります.
- 公式 OSRF サポートではない
- ROS-O はコミュニティベースで,Open Robotics 公式長期保守ではない
- 全 ROS1 パッケージが必ず動くわけではない
- 古いパッケージは新しい Ubuntu での言語バージョンなどの違いは修正が必要な可能性あり
- ROS2 ネイティブ機能の恩恵は得られない
- ROS2 と比べた ROS1 の本質的制約: DDS 非対応, QoS 設定なしなど
参考となるページ
- GitHub Organization: ros-o
- https://github.com/ros-o
- ROS-O プロジェクトの本拠地
- GitHub – ros-o / ros-o
- https://github.com/ros-o/ros-o/
- プロジェクトの概要
- GitHub – ros-o / ros-o / Discussions
- https://github.com/ros-o/ros-o/discussions
- プロジェクトの議論のページ
- ROS Discourse
- https://discourse.ros.org/(「ros-o」で検索)
- ROS コミュニティ全体で ROS1 のメンテナンス継続について議論された際のスレッドなど
今回の記事はここまでです.
本シリーズ次回の記事では ROS-O のインストール方法について説明する予定です.
SwitchBot を ROS から利用する – データ取得デバイスの追加方法
本シリーズ前回の記事 SwitchBot を ROS から利用する – データ取得編 掲載以降,手元にある SwitchBot デバイスの種類が増えてきました.
そこで今回の記事では switchbot_ros でまだ対応していないデバイスのデータを取得・パブリッシュするためにコードを追加する様子を紹介します.追加例としてデバイス「SwitchBot CO2センサー(温湿度計)」のデータを取得して ROS Topic としてパブリッシュできるようにします.
SwitchBot API の確認
追加したいデバイスが SwitchBot API で対応していないと switchbot_ros 側でも対応はできないので最初に SwitchBot API のドキュメントを調べます.
SwitchBot API v1.1 ドキュメント にデバイスのリスト取得とステータス取得の項目に「Meter Pro CO2」の記述があり,これが今回追加してみたデバイス「SwitchBot CO2センサー(温湿度計)」に対応したものとなっていました.
- Devices / Get device list / Responses / Meter Pro CO2
- Devices / Get device status / Responses / Meter Pro CO2
制御コマンドの一覧には CO2 センサーらしき記述が(少なくとも本記事執筆時には)ありませんので「SwitchBot CO2センサー(温湿度計)」には取得系コマンドのみが対応していて,制御系コマンドは無いようです.
SwitchBot API ドキュメントにある「SwitchBot CO2センサー(温湿度計)」のステータス取得で返されるデータの表を下に抜粋しましたので確認してみます.
| Key | Value Type | Description |
|---|---|---|
| deviceId | String | device ID |
| deviceType | String | device type. MeterPro(CO2) |
| hubDeviceId | String | device’s parent Hub ID |
| battery | Integer | the current battery level, 0-100 |
| version | String | the current firmware version, e.g. V4.2 |
| temperature | Float | temperature in celsius |
| humidity | Integer | humidity percentage |
| CO2 | Integer | CO2 ppm value, 0-9999 |
二酸化炭素濃度が単位 [ppm](百万分率)で範囲 0〜9999 の整数型データとして返されることが分かります.他は SwitchBot の温湿度計と同じように各測定値が得られるようです.
switchbot_ros への機能追加
switchbot_ros に機能追加したいデバイス「SwitchBot CO2センサー(温湿度計)」について SwitchBot API が対応していることと API により取得できる測定値が分かりましたので実装してゆきます.もう少し具体化すると「SwitchBot CO2センサー(温湿度計)」から API 経由で得られた
- 温度
- 湿度
- バッテリーレベル
- CO2濃度
の4つの値を ROS Topic としてパブリッシュします.
SwitchBot API によるデータの取得と ROS Topic のパブリッシュプロセスは switchbot_ros にある既存のルーチンをそのまま利用できますので今回新たに実装する部分は大まかには次の2つです.
- 「SwitchBot CO2センサー(温湿度計)」に対応したメッセージ型の定義
- 「SwitchBot CO2センサー(温湿度計)」メッセージ型に取得データを代入
先に結論としてコードの追加部分を下に記載してしまいます.ファイルとしては3点,追加箇所としては5点です.
- switchbot_ros / msg / MeterProCO2.msg (ファイル追加)
- 「SwitchBot CO2センサー(温湿度計)」に対応したメッセージ型の定義
- switchbot_ros / CMakeLists.txt (記述追加)
- MeterProCO2.msg の add_message_files() への追加
- switchbot_ros / scripts / switchbot_status_publisher.py (記述追加)
- インポートクラス MeterProCO2 の追加
- パブリッシャーのメッセージクラス設定においてデバイスタイプ MeterPro(CO2) の場合のメッセージクラス MeterProCO2 を追加
- MeterProCO2 の場合のメッセージクラス各要素への取得データ代入処理の追加
- <参考>
追加デバイス用メッセージの定義
今回追加する「SwitchBot CO2センサー(温湿度計)」に対応したメッセージ型 MeterProCO2.msg を定義します.
パブリッシュする4つのデータ「温度」「湿度」「バッテリーレベル」「CO2濃度」のうち3つ 温度,湿度,バッテリーレベル は Meter.msg と同じなので Meter.msg を複製してファイル名を MeterProCO2.msg に変更して CO2濃度 のデータ型を追加する方法で作成しました.
switchbot_ros / msg / MeterProCO2.msg
Header  header       # timestamp

float64 temperature  # temperature in celsius
float64 humidity     # humidity percentage
float64 battery      # the current battery level, 0-100

int64   co2ppm       # CO2 ppm value, 0-9999
新しいメッセージ型を定義した場合はパッケージの CMakeLists.txt 内の add_message_files() に追記する必要があります.
switchbot_ros / CMakeLists.txt
add_message_files(
  FILES
  Device.msg
  DeviceArray.msg
  Meter.msg
  MeterProCO2.msg
  PlugMini.msg
  Hub2.msg
  Bot.msg
  StripLight.msg
)
追加デバイス対応プログラムコード更新
新しいメッセージ型 MeterProCO2.msg の準備ができましたので取得データの代入などの機能をパブリッシャーの Python のプログラムファイル switchbot_ros / scripts / switchbot_status_publisher.py に追加記述します.
追加した MeterProCO2.msg を switchbot_status_publisher.py 内で利用するためにメッセージクラス MeterProCO2 を import しておきます.
switchbot_ros / scripts / switchbot_status_publisher.py
#!/usr/bin/env python

import os.path
from requests import ConnectionError
import rospy
from switchbot_ros.switchbot import SwitchBotAPIClient
from switchbot_ros.switchbot import DeviceError, SwitchBotAPIError
from switchbot_ros.msg import Meter, PlugMini, Hub2, Bot, StripLight, MeterProCO2
初期化関数定義 def __init__(self): 内のパブリッシャーのメッセージクラス設定を行う部分にデバイスタイプ MeterPro(CO2) の場合の条件分岐を追加して MeterProCO2 をメッセージクラスとして設定します.
switchbot_ros / scripts / switchbot_status_publisher.py
        # Publisher Message Class for each device type
        if self.device_type == 'Remote':
            rospy.logerr('Device Type: "' + self.device_type + '" has no status in specifications.')
            return
        else:
            if self.device_type == 'Meter':
                self.msg_class = Meter
            elif self.device_type == 'MeterPlus':
                self.msg_class = Meter
            elif self.device_type == 'WoIOSensor':
                self.msg_class = Meter
            elif self.device_type == 'Hub 2':
                self.msg_class = Hub2
            elif self.device_type == 'Plug Mini (JP)':
                self.msg_class = PlugMini
            elif self.device_type == 'Plug Mini (US)':
                self.msg_class = PlugMini
            elif self.device_type == 'Bot':
                self.msg_class = Bot
            elif self.device_type == 'Strip Light':
                self.msg_class = StripLight
            elif self.device_type == 'MeterPro(CO2)':
                self.msg_class = MeterProCO2
            else:
                rospy.logerr('No publisher process for "' + self.device_type + '" in switchbot_status_publisher.py')
                return
繰り返し関数定義 def spin(self): 内のパブリッシュするメッセージクラスごとの場合分けに MeterProCO2 を追加して SwitchBot API により取得した各データを MeterProCO2 メッセージの各要素に代入します.
switchbot_ros / scripts / switchbot_status_publisher.py
                if status:
                    time = rospy.get_rostime()
                    if self.msg_class == Meter:
                        msg = Meter()
                        msg.header.stamp = time
                        msg.temperature  = status['temperature']
                        msg.humidity     = status['humidity']
                        msg.battery      = status['battery']
                    elif self.msg_class == Hub2:
                        msg = Hub2()
                        msg.header.stamp = time
                        msg.temperature  = status['temperature']
                        msg.humidity     = status['humidity']
                        msg.light_level  = status['lightLevel']
                    elif self.msg_class == PlugMini:
                        msg = PlugMini()
                        msg.header.stamp = time
                        msg.voltage      = status['voltage']
                        msg.weight       = status['weight']
                        msg.current      = status['electricCurrent']
                        msg.minutes_day  = status['electricityOfDay']
                    elif self.msg_class == Bot:
                        msg = Bot()
                        msg.header.stamp = time
                        msg.battery      = status['battery']
                        if status['power'] == 'on':
                            msg.power    = True
                        else:
                            msg.power    = False
                        msg.device_mode  = status['deviceMode']
                    elif self.msg_class == StripLight:
                        msg = StripLight()
                        msg.header.stamp = time
                        if status['power'] == 'on':
                            msg.power    = True
                        else:
                            msg.power    = False
                        msg.brightness   = status['brightness']
                        rgb_string       = status['color']
                        r, g, b = map(int, rgb_string.split(':'))
                        msg.color_r      = r
                        msg.color_g      = g
                        msg.color_b      = b
                    elif self.msg_class == MeterProCO2:
                        msg = MeterProCO2()
                        msg.header.stamp = time
                        msg.temperature  = status['temperature']
                        msg.humidity     = status['humidity']
                        msg.battery      = status['battery']
                        msg.co2ppm       = status['CO2']
                    else:
                        return
今回の「SwitchBot CO2センサー(温湿度計)」のデータ取得とその ROS Topic へのパブリッシュに関するファイルの追加・コード変更は以上です.
ビルドと環境設定
今回の変更で新しいメッセージ型を定義して導入していますのでパッケージのビルドを行い,環境設定を改めて行います.
switchbot_ros を含む jsk_3rdparty のビルド
$ source /opt/ros/noetic/setup.bash
$ cd ~/switchbot_ws
$ catkin build
$ source ~/switchbot_ws/devel/setup.bash
switchbot_ros に追加した機能の動作確認
まず利用可能な SwitchBot デバイス名リストを取得・確認してから,得られた新規追加したデバイス名を指定して SwitchBot デバイスのステータスデータの取得と ROS Topic へのパブリッシュを行い,実際にパブリッシュされているかを ROS Topic を表示して確認します.
実行方法は今回機能追加するより前の方法と同じで,launch 時にオプション指定するデバイス名を変えるだけです.
利用可能な SwitchBot デバイス名の取得
ターミナル 1 : switchbot_ros の実行
SwitchBot API 経由で今回追加した「SwitchBot CO2センサー(温湿度計)」の「デバイス名」と「デバイスタイプ」が取得できることを確認します.ユーザの SwitchBot アカウントで登録されているデバイスの「デバイス名」と「デバイスタイプ」は switchbot.launch を実行すると表示されます.
(下記 launch オプションの YOUR_TOKEN と YOUR_SECRET をそれぞれユーザアカウントのトークンとシークレットに置き換えて実行)
switchbot.launch 実行入力
$ source ~/switchbot_ws/devel/setup.bash
$ roslaunch switchbot_ros switchbot.launch token:=YOUR_TOKEN secret:=YOUR_SECRET
switchbot.launch 実行出力例
... logging to /home/robotuser/.ros/log/999f113c-b07d-11ef-9b82-a11b8fd4bdd2/roslaunch-robotuser-PC-7718.log
Checking log directory for disk usage. This may take a while.
Press Ctrl-C to interrupt
Done checking log file disk usage. Usage is <1GB.

started roslaunch server http://robotuser-PC:43087/

SUMMARY
========

PARAMETERS
 * /rosdistro: noetic
 * /rosversion: 1.17.0
 * /switchbot_ros/secret: (シークレットの上位数桁が表示)...
 * /switchbot_ros/token: (トークンの上位数桁が表示)...

NODES
  /
    switchbot_ros (switchbot_ros/switchbot_ros_server.py)

auto-starting new master
process[master]: started with pid [7726]
ROS_MASTER_URI=http://localhost:11311

setting /run_id to 999f113c-b07d-11ef-9b82-a11b8fd4bdd2
process[rosout-1]: started with pid [7736]
started core service [/rosout]
process[switchbot_ros-2]: started with pid [7743]
[INFO] [1733123900.102425]: Switchbot API Client initialized.
[INFO] [1733123900.104175]: Using SwitchBot API v1.1
[INFO] [1733123900.106131]: Switchbot Device List:
9 Item(s)
deviceName: bot74a, deviceID: (固有のID番号が表示), deviceType: Bot
deviceName: cam-entrance01, deviceID: (固有のID番号が表示), deviceType: None
deviceName: co2sensor-ba1, deviceID: (固有のID番号が表示), deviceType: MeterPro(CO2)
deviceName: hub2a, deviceID: (固有のID番号が表示), deviceType: Hub 2
deviceName: plugmini7a1, deviceID: (固有のID番号が表示), deviceType: Plug Mini (JP)
deviceName: remote-button10a, deviceID: (固有のID番号が表示), deviceType: Remote
deviceName: tapelight7a1, deviceID: (固有のID番号が表示), deviceType: Strip Light
deviceName: thermo-hygrometer-f7a, deviceID: (固有のID番号が表示), deviceType: Meter
deviceName: trackcard01, deviceID: (固有のID番号が表示), deviceType: None

[INFO] [1733123900.107799]: Switchbot Remote List:
2 Item(s)
deviceName: air-conditioner, deviceID: (固有のID番号が表示), remoteType: Air Conditioner
deviceName: pendant-light, deviceID: (固有のID番号が表示), remoteType: DIY Light

[INFO] [1733123900.109488]: Switchbot Scene List:
2 Item(s)
sceneName: turnoff-all-lights, sceneID: (固有のID番号が表示)
sceneName: turnon-all-lights, sceneID: (固有のID番号が表示)

[INFO] [1733123900.139015]: Ready.
追加した「SwitchBot CO2センサー(温湿度計)」のデバイス名 co2sensor-ba1 がコンソール出力されたので一旦 Ctrl-C にて switchbot.launch を終了します.
SwitchBot デバイスのステータスデータの取得・パブリッシュ
「SwitchBot CO2センサー(温湿度計)」のステータスデータを取得してパブリッシュされている ROS Topic を表示して確認してみます.前述の switchbot.launch の実行出力例からデバイス名が co2sensor-ba1 となっています.
ステータスデータを取得する場合は switchbot.launch 実行時に次の2つのオプションを追加します.
pub_status:=trueステータスを取得・パブリッシュを実行するオプション true/falsepub_device_name:=デバイス名の指定(今回の例co2sensor-ba1)
ターミナル 1 : switchbot_ros の実行
switchbot.launch 実行入力
$ source ~/switchbot_ws/devel/setup.bash
$ roslaunch switchbot_ros switchbot.launch token:=YOUR_TOKEN secret:=YOUR_SECRET pub_status:=true pub_device_name:=co2sensor-ba1 pub_status_rate:=0.016666
- 注1) 上記テキストボックスの横スクロールで全 launch オプションが表示されます.
- 注2) 各 launch オプションについて
YOUR_TOKENとYOUR_SECRETは各々の SwitchBot アカウントのトークンとシークレットに置き換えて実行してください.pub_status:=trueでステータスを取得・パブリッシュを実行します.pub_device_name:=co2sensor-ba1のco2sensor-ba1は各ユーザ利用のデバイス名に変更してください.pub_status_rate:=0.016666でステータスを取得・パブリッシュする周波数 [Hz] を設定します.(本例では 0.016666[Hz] = 約60秒に1回)
switchbot.launch 実行出力例
... logging to /home/robotuser/.ros/log/e454822a-b07d-11ef-9b82-a11b8fd4bdd2/roslaunch-robotuser-PC-7804.log
Checking log directory for disk usage. This may take a while.
Press Ctrl-C to interrupt
Done checking log file disk usage. Usage is <1GB.

started roslaunch server http://robotuser-PC:36557/

SUMMARY
========

PARAMETERS
 * /rosdistro: noetic
 * /rosversion: 1.17.0
 * /switchbot_ros/secret: (シークレットの上位数桁が表示)...
 * /switchbot_ros/token: (トークンの上位数桁が表示)...
 * /switchbot_status_publisher/device_name: co2sensor-ba1
 * /switchbot_status_publisher/rate: 0.016666
 * /switchbot_status_publisher/secret: (シークレットの上位数桁が表示)...
 * /switchbot_status_publisher/token: (トークンの上位数桁が表示)...

NODES
  /
    switchbot_ros (switchbot_ros/switchbot_ros_server.py)
    switchbot_status_publisher (switchbot_ros/switchbot_status_publisher.py)

auto-starting new master
process[master]: started with pid [7812]
ROS_MASTER_URI=http://localhost:11311

setting /run_id to e454822a-b07d-11ef-9b82-a11b8fd4bdd2
process[rosout-1]: started with pid [7822]
started core service [/rosout]
process[switchbot_ros-2]: started with pid [7829]
process[switchbot_status_publisher-3]: started with pid [7830]
[INFO] [1733124025.952044]: Switchbot API Client initialized.
[INFO] [1733124025.953872]: Using SwitchBot API v1.1
[INFO] [1733124025.955817]: Switchbot Device List:
9 Item(s)
deviceName: bot74a, deviceID: (固有のID番号が表示), deviceType: Bot
deviceName: cam-entrance01, deviceID: (固有のID番号が表示), deviceType: None
deviceName: co2sensor-ba1, deviceID: (固有のID番号が表示), deviceType: MeterPro(CO2)
deviceName: hub2a, deviceID: (固有のID番号が表示), deviceType: Hub 2
deviceName: plugmini7a1, deviceID: (固有のID番号が表示), deviceType: Plug Mini (JP)
deviceName: remote-button10a, deviceID: (固有のID番号が表示), deviceType: Remote
deviceName: tapelight7a1, deviceID: (固有のID番号が表示), deviceType: Strip Light
deviceName: thermo-hygrometer-f7a, deviceID: (固有のID番号が表示), deviceType: Meter
deviceName: trackcard01, deviceID: (固有のID番号が表示), deviceType: None

[INFO] [1733124025.957387]: Switchbot Remote List:
2 Item(s)
deviceName: air-conditioner, deviceID: (固有のID番号が表示), remoteType: Air Conditioner
deviceName: pendant-light, deviceID: (固有のID番号が表示), remoteType: DIY Light

[INFO] [1733124025.959085]: Switchbot Scene List:
2 Item(s)
sceneName: turnoff-all-lights, sceneID: (固有のID番号が表示)
sceneName: turnon-all-lights, sceneID: (固有のID番号が表示)

[INFO] [1733124025.981926]: Ready.
[INFO] [1733124026.191206]: Switchbot API Client initialized.
[INFO] [1733124026.192948]: Using SwitchBot API v1.1
[INFO] [1733124026.195299]: Rate: 0.016666
[INFO] [1733124026.197702]: deviceName: co2sensor-ba1 / deviceType: MeterPro(CO2)
[INFO] [1733124026.200537]: Ready: SwitchBot Status Publisher for co2sensor-ba1
ターミナル 2 : ROS Topic の確認
rostopic list の実行入力
$ source ~/switchbot_ws/devel/setup.bash
$ rostopic list
rostopic list の実行出力例
/rosout
/rosout_agg
/switchbot_ros/devices
/switchbot_ros/switch/cancel
/switchbot_ros/switch/feedback
/switchbot_ros/switch/goal
/switchbot_ros/switch/result
/switchbot_ros/switch/status
/switchbot_status_publisher/co2sensor_ba1
rostopic echo 実行入力
$ rostopic echo /switchbot_status_publisher/co2sensor_ba1
rostopic echo の実行出力例
header:
  seq: 1
  stamp:
    secs: 1733124088
    nsecs:   5677223
  frame_id: ''
temperature: 25.4
humidity: 35.0
battery: 100.0
co2ppm: 562
---
header:
  seq: 2
  stamp:
    secs: 1733124147
    nsecs: 910016298
  frame_id: ''
temperature: 25.4
humidity: 35.0
battery: 100.0
co2ppm: 562
---
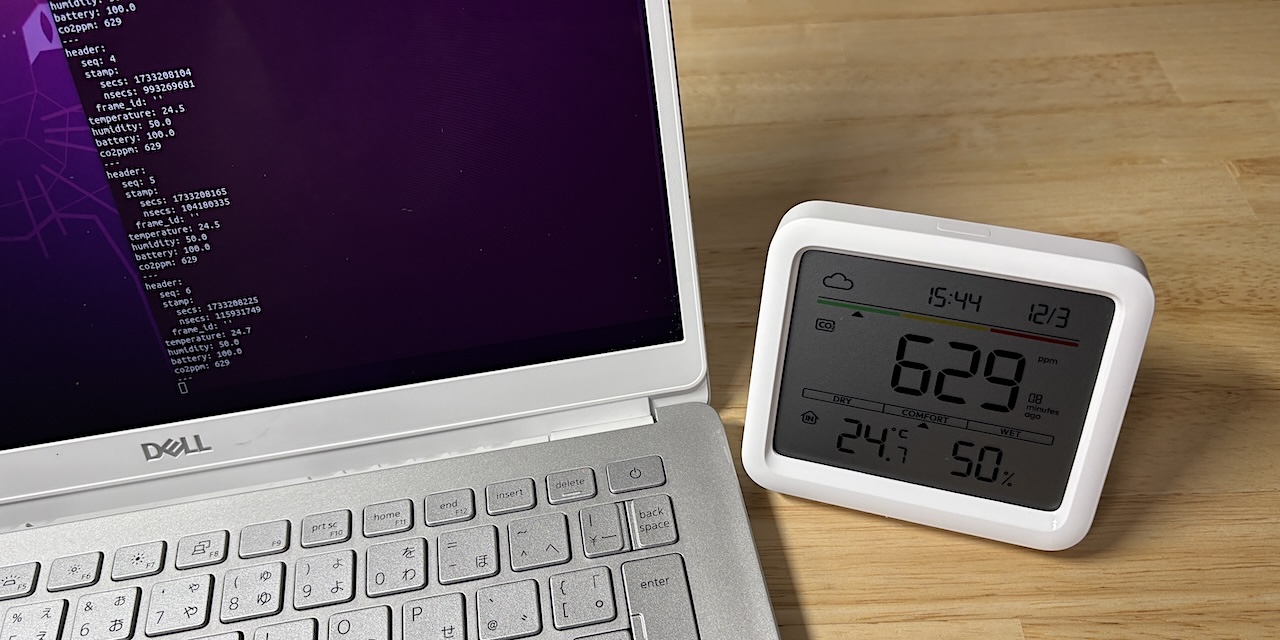
「SwitchBot CO2センサー(温湿度計)」のステータスデータとして CO2濃度 などが取得されて ROS Topic にパブリッシュされている様子が見て取れるかと思います.
今回の記事はここまでです.

SwitchBot を ROS から利用する – データ取得編
本シリーズ前回の記事 SwitchBot を ROS から利用する – コマンド操作編2 では SwitchBot を ROS から利用する switchbot_ros のサンプルのソースコードで扱われていた SwitchBot デバイス以外のものを ROS から操作するために SwitchBot API のコマンドセットを調べて control_switchbot.py に実装する過程について紹介しました.
今回は SwitchBot デバイスのステータスデータの取得と ROS トピックへのパブリッシュを行ってみます.
switchbot_ros の更新・ビルド
前回の記事 SwitchBot を ROS から利用する – コマンド操作編2 を公開した後に GitHub 上の switchbot_ros が更新されて SwitchBot デバイスのステータスデータの取得とパブリッシュを行うソフトウェアソースコードが追加されました.
更新された switchbot_ros を実際に動作させる Ubuntu PC 内の switchbot_ros に適用してビルドします.
既に前回の記事の時点の switchbot_ros を含む jsk_3rdparty をクローンして利用している場合は次の手順で更新された GitHub 上の jsk_3rdparty を git でプル(ダウンロード更新)してビルドします.
switchbot_ros を含む jsk_3rdparty の更新とビルド
$ source ~/switchbot_ws/devel/setup.bash
$ cd ~/switchbot_ws/src/jsk_3rdparty
$ git checkout master
$ git pull origin master
$ catkin build
$ source ~/switchbot_ws/devel/setup.bash
利用可能な SwitchBot デバイス名の取得
ターミナル 1 : switchbot_ros の実行
前回記事と同じですがユーザの SwitchBot アカウントで登録されているデバイスの「デバイス名」と「デバイスタイプ」は switchbot.launch を実行すると表示されます.
(下記 launch オプションの YOUR_TOKEN と YOUR_SECRET をそれぞれユーザアカウントのトークンとシークレットに置き換えて実行)
switchbot.launch 実行入力
$ source ~/switchbot_ws/devel/setup.bash
$ roslaunch switchbot_ros switchbot.launch token:=YOUR_TOKEN secret:=YOUR_SECRET
switchbot.launch 実行出力例
... logging to /home/robotuser/.ros/log/87b6e5c8-c1a2-11ee-bce7-1d89a9d14e1f/roslaunch-robotuser-PC-62866.log
Checking log directory for disk usage. This may take a while.
Press Ctrl-C to interrupt
Done checking log file disk usage. Usage is <1GB.

started roslaunch server http://robotuser-PC:40731/

SUMMARY
========

PARAMETERS
 * /rosdistro: noetic
 * /rosversion: 1.16.0
 * /switchbot_ros/secret: (シークレットの上位数桁が表示)...
 * /switchbot_ros/token: (トークンの上位数桁が表示)...

NODES
  /
    switchbot_ros (switchbot_ros/switchbot_ros_server.py)

auto-starting new master
process[master]: started with pid [62874]
ROS_MASTER_URI=http://localhost:11311

setting /run_id to 87b6e5c8-c1a2-11ee-bce7-1d89a9d14e1f
process[rosout-1]: started with pid [62884]
started core service [/rosout]
process[switchbot_ros-2]: started with pid [62891]
[INFO] [1706861436.195243]: Switchbot API Client initialized.
[INFO] [1706861436.199678]: Using SwitchBot API v1.1
[INFO] [1706861436.204957]: Switchbot Device List:
6 Item(s)
deviceName: bot74a, deviceID: (固有のID番号が表示), deviceType: Bot
deviceName: hub2a, deviceID: (固有のID番号が表示), deviceType: Hub 2
deviceName: plugmini7a1, deviceID: (固有のID番号が表示), deviceType: Plug Mini (JP)
deviceName: remote-button10a, deviceID: (固有のID番号が表示), deviceType: Remote
deviceName: tapelight7a1, deviceID: (固有のID番号が表示), deviceType: Strip Light
deviceName: thermo-hygrometer-f7a, deviceID: (固有のID番号が表示), deviceType: Meter

[INFO] [1706861436.208853]: Switchbot Remote List:
2 Item(s)
deviceName: air-conditioner, deviceID: (固有のID番号が表示), remoteType: Air Conditioner
deviceName: pendant-light, deviceID: (固有のID番号が表示), remoteType: DIY Light

[INFO] [1706861436.214168]: Switchbot Scene List:
3 Item(s)
sceneName: turnoff-all-lights, sceneID: (固有のID番号が表示)
sceneName: turnon-all-lights, sceneID: (固有のID番号が表示)
sceneName: turnon-all-lights, sceneID: (固有のID番号が表示)

[INFO] [1706861436.254126]: Ready.
利用可能なデバイス名がコンソール出力されたので一旦 Ctrl-C にて switchbot.launch を終了します.
上記の switchbot.launch 実行出力例にある SwitchBot デバイスのうち取得するステータスがない Remote 以外の次のデバイスタイプは switchbot_ros にてステータスデータを取得することができます.
- Bot
- Hub 2
- Meter
- Plug Mini (JP)
- Strip Light
また上記リスト以外のデータ取得 API 提供がされている SwitchBot デバイスについては switchbot_ros のコードに組み込まれていませんが適宜情報をコードに加えれば switchbot_ros からもデータ取得できるようになると思います.
SwitchBot デバイスのステータスデータの取得と確認
実行例として今回は SwitchBot の温湿度計(デバイスタイプ Meter)のステータスデータを取得してパブリッシュされている ROS トピックを表示してみます.先述の switchbot.launch の実行出力例から読み取ると,該当するデバイス名が thermo-hygrometer-f7a となっています.
ステータスデータを取得する場合は switchbot.launch 実行時に次の2つのオプションを追加します.
pub_status:=trueステータスを取得・パブリッシュを実行するオプション true/falsepub_device_name:=thermo-hygrometer-f7aデバイス名の指定(本例では thermo-hygrometer-f7a)
ターミナル 1 : switchbot_ros の実行
switchbot.launch 実行入力
$ source ~/switchbot_ws/devel/setup.bash
$ roslaunch switchbot_ros switchbot.launch token:=YOUR_TOKEN secret:=YOUR_SECRET pub_status:=true pub_device_name:=thermo-hygrometer-f7a
- 注1) 上記テキストボックスの横スクロールで全 launch オプションが表示されます.
- 注2) 各 launch オプションについて
YOUR_TOKENとYOUR_SECRETは各々の SwitchBot アカウントのトークンとシークレットに置き換えて実行してください.pub_status:=trueでステータスを取得・パブリッシュを実行します.pub_device_name:=thermo-hygrometer-f7aのthermo-hygrometer-f7aは各ユーザ利用のデバイス名に変更してください.
switchbot.launch 実行出力例
... logging to /home/robotuser/.ros/log/81bc64b6-faf2-11ee-8dad-e57ee950b51d/roslaunch-robotuser-PC-28197.log
Checking log directory for disk usage. This may take a while.
Press Ctrl-C to interrupt
Done checking log file disk usage. Usage is <1GB.

started roslaunch server http://robotuser-PC:35371/

SUMMARY
========

PARAMETERS
 * /rosdistro: noetic
 * /rosversion: 1.16.0
 * /switchbot_ros/secret: (シークレットの上位数桁が表示)...
 * /switchbot_ros/token: (トークンの上位数桁が表示)...
 * /switchbot_status_publisher/device_name: thermo-hygrometer...
 * /switchbot_status_publisher/rate: 0.1
 * /switchbot_status_publisher/secret: (シークレットの上位数桁が表示)...
 * /switchbot_status_publisher/token: (トークンの上位数桁が表示)...

NODES
  /
    switchbot_ros (switchbot_ros/switchbot_ros_server.py)
    switchbot_status_publisher (switchbot_ros/switchbot_status_publisher.py)

auto-starting new master
process[master]: started with pid [28205]
ROS_MASTER_URI=http://localhost:11311

setting /run_id to 81bc64b6-faf2-11ee-8dad-e57ee950b51d
process[rosout-1]: started with pid [28215]
started core service [/rosout]
process[switchbot_ros-2]: started with pid [28222]
process[switchbot_status_publisher-3]: started with pid [28223]
[INFO] [1713163000.937913]: Switchbot API Client initialized.
[INFO] [1713163000.938005]: Switchbot API Client initialized.
[INFO] [1713163000.940084]: Using SwitchBot API v1.1
[INFO] [1713163000.940382]: Using SwitchBot API v1.1
[INFO] [1713163000.942545]: Switchbot Device List:
6 Item(s)
deviceName: bot74a, deviceID: (固有のID番号が表示), deviceType: Bot
deviceName: hub2a, deviceID: (固有のID番号が表示), deviceType: Hub 2
deviceName: plugmini7a1, deviceID: (固有のID番号が表示), deviceType: Plug Mini (JP)
deviceName: remote-button10a, deviceID: (固有のID番号が表示), deviceType: Remote
deviceName: tapelight7a1, deviceID: (固有のID番号が表示), deviceType: Strip Light
deviceName: thermo-hygrometer-f7a, deviceID: (固有のID番号が表示), deviceType: Meter

[INFO] [1713163000.944131]: Switchbot Remote List:
2 Item(s)
deviceName: air-conditioner, deviceID: (固有のID番号が表示), remoteType: Air Conditioner
deviceName: pendant-light, deviceID: (固有のID番号が表示), remoteType: DIY Light

[INFO] [1713163000.944268]: Rate: 0.1
[INFO] [1713163000.945732]: Switchbot Scene List:
2 Item(s)
sceneName: turnoff-all-lights, sceneID: (固有のID番号が表示)
sceneName: turnon-all-lights, sceneID: (固有のID番号が表示)

[INFO] [1713163000.947428]: deviceName: thermo-hygrometer-f7a / deviceType: Meter
[INFO] [1713163000.951801]: Ready: SwitchBot Status Publisher for thermo-hygrometer-f7a
[INFO] [1713163000.966800]: Ready.
ターミナル 2 : ROS トピックの確認
rostopic list の実行入力
$ source ~/switchbot_ws/devel/setup.bash
$ rostopic list
rostopic list の実行出力例
/rosout
/rosout_agg
/switchbot_ros/devices
/switchbot_ros/switch/cancel
/switchbot_ros/switch/feedback
/switchbot_ros/switch/goal
/switchbot_ros/switch/result
/switchbot_ros/switch/status
/switchbot_status_publisher/thermo_hygrometer_f7a
rostopic echo 実行入力
$ rostopic echo /switchbot_status_publisher/thermo_hygrometer_f7a
rostopic echo の実行出力例
header:
  seq: 1
  stamp:
    secs: 1713163093
    nsecs: 412018775
  frame_id: ''
temperature: 26.9
humidity: 36.0
battery: 100.0
---
header:
  seq: 2
  stamp:
    secs: 1713163103
    nsecs: 447003364
  frame_id: ''
temperature: 26.9
humidity: 36.0
battery: 100.0
---
header:
  seq: 3
  stamp:
    secs: 1713163113
    nsecs: 380291700
  frame_id: ''
temperature: 26.9
humidity: 36.0
battery: 100.0
SwitchBot 温湿度計 Meter のステータスデータとして温度・湿度などが取得されて ROS トピックにパブリッシュされている様子がわかるかと思います.
ステータスの取得とパブリッシュの間隔は switchbot.launch のデフォルト設定で 0.1 [Hz] = 10秒間隔 になっています.これを変更する場合には switchbot.launch のオプションで pub_status_rate:=0.05 のように追加します.温湿度のように急に変化しなさそうなデータの場合はもっと長めの間隔でも良いかもしれません.
今回の記事はここまでです.
SwitchBot を ROS から利用する – コマンド操作編2
本シリーズ前回の記事 SwitchBot を ROS から利用する – コマンド操作編1 では SwitchBot を ROS から利用する switchbot_ros の導入とサンプル Python コードの実行の様子を紹介しました.
今回は前回の記事の続きとしてサンプルのソースコードで扱われていた SwitchBot デバイス以外のものを ROS から操作するために SwitchBot API のコマンドセットを調べて control_switchbot.py に実装する過程について紹介します.
- 利用可能な SwitchBot デバイス情報の取得
- SwitchBot デバイス API コマンドセットの調査
- SwitchBot デバイスコマンドのソースコード追記
利用可能な SwitchBot デバイス情報の取得
switchbot_ros のサンプル Python コード control_switchbot.py においてボット(スイッチ)をオンにする命令は次のようになっていて「デバイス名」とそれに対する「コマンド」の2つを指定する必要があります.
client.control_device('bot74a', 'turnOn')
client.control_device('デバイス名', 'コマンド')
このうち「コマンド」は SwitchBot API にてデバイスタイプごとに設定されているので「デバイスタイプ」が何かを知る必要があります.
ユーザのアカウントで登録されているデバイスの「デバイス名」と「デバイスタイプ」は switchbot.launch を実行すると表示されます.
(下記 launch オプションの YOUR_TOKEN と YOUR_SECRET をそれぞれユーザアカウントのトークンとシークレットに置き換えて実行)
switchbot.launch 実行入力
$ source ~/switchbot_ws/devel/setup.bash
$ roslaunch switchbot_ros switchbot.launch token:=YOUR_TOKEN secret:=YOUR_SECRET
switchbot.launch 実行出力例
... logging to /home/robotuser/.ros/log/87b6e5c8-c1a2-11ee-bce7-1d89a9d14e1f/roslaunch-robotuser-PC-62866.log
Checking log directory for disk usage. This may take a while.
Press Ctrl-C to interrupt
Done checking log file disk usage. Usage is <1GB.

started roslaunch server http://robotuser-PC:40731/

SUMMARY
========

PARAMETERS
 * /rosdistro: noetic
 * /rosversion: 1.16.0
 * /switchbot_ros/secret: (シークレットの上位数桁が表示)...
 * /switchbot_ros/token: (トークンの上位数桁が表示)...

NODES
  /
    switchbot_ros (switchbot_ros/switchbot_ros_server.py)

auto-starting new master
process[master]: started with pid [62874]
ROS_MASTER_URI=http://localhost:11311

setting /run_id to 87b6e5c8-c1a2-11ee-bce7-1d89a9d14e1f
process[rosout-1]: started with pid [62884]
started core service [/rosout]
process[switchbot_ros-2]: started with pid [62891]
[INFO] [1706861436.195243]: Switchbot API Client initialized.
[INFO] [1706861436.199678]: Using SwitchBot API v1.1
[INFO] [1706861436.204957]: Switchbot Device List:
6 Item(s)
deviceName: bot74a, deviceID: (固有のID番号が表示), deviceType: Bot
deviceName: hub2a, deviceID: (固有のID番号が表示), deviceType: Hub 2
deviceName: plugmini7a1, deviceID: (固有のID番号が表示), deviceType: Plug Mini (JP)
deviceName: remote-button10a, deviceID: (固有のID番号が表示), deviceType: Remote
deviceName: tapelight7a1, deviceID: (固有のID番号が表示), deviceType: Strip Light
deviceName: thermo-hygrometer-f7a, deviceID: (固有のID番号が表示), deviceType: Meter

[INFO] [1706861436.208853]: Switchbot Remote List:
2 Item(s)
deviceName: air-conditioner, deviceID: (固有のID番号が表示), remoteType: Air Conditioner
deviceName: pendant-light, deviceID: (固有のID番号が表示), remoteType: DIY Light

[INFO] [1706861436.214168]: Switchbot Scene List:
3 Item(s)
sceneName: turnoff-all-lights, sceneID: (固有のID番号が表示)
sceneName: turnon-all-lights, sceneID: (固有のID番号が表示)
sceneName: turnon-all-lights, sceneID: (固有のID番号が表示)

[INFO] [1706861436.254126]: Ready.
switchbot.launch 実行出力から次の1行を例にとると「デバイス名」が plugmini7a1 で「デバイスタイプ」が Plug Mini (JP) です.
deviceName: plugmini7a1, deviceID: (固有のID番号が表示), deviceType: Plug Mini (JP)
SwitchBot デバイス API コマンドセットの調査
操作したい SwitchBot デバイスタイプが分かればそのコマンドセットを調べます.SwitchBot API のコマンドセットは下記の Web ページで知ることができます.
今回はデバイスタイプ Plug Mini (JP) と Strip Light のデバイスを操作したいのでそれらのコマンドセットについて調べます.
Plug Mini (JP) のコマンドセット
電源プラグの On/Off を行う SwitchBot デバイスである Plug Mini (JP) のコマンドセットの説明は次のリンク先にあります.
上記 Web ページの Plug Mini (JP) コマンドセットの表をそのまま貼り付けたものが次の表です.
| deviceType | commandType | Command | command parameter | Description |
|---|---|---|---|---|
| Plug Mini (JP) | command | turnOn | default | set to ON state |
| Plug Mini (JP) | command | turnOff | default | set to OFF state |
| Plug Mini (JP) | command | toggle | default | toggle state |
デバイスの機能どおりに電源入 turnOn,電源切 turnOff,電源入切の切替 toggle の3つのコマンドにより構成されています.
Strip Light のコマンドセット
テープライト形状の SwitchBot デバイスである Strip Light のコマンドセットの説明は次のリンク先にあります.
上記 Web ページの Strip Light コマンドセットの表をそのまま貼り付けたものが次の表です.
| deviceType | commandType | Command | command parameter | Description |
|---|---|---|---|---|
| Strip Light | command | turnOn | default | set to ON state |
| Strip Light | command | turnOff | default | set to OFF state |
| Strip Light | command | toggle | default | toggle state |
| Strip Light | command | setBrightness | {1-100} |
set brightness |
| Strip Light | command | setColor | "{0-255}:{0-255}:{0-255}" |
set RGB color value |
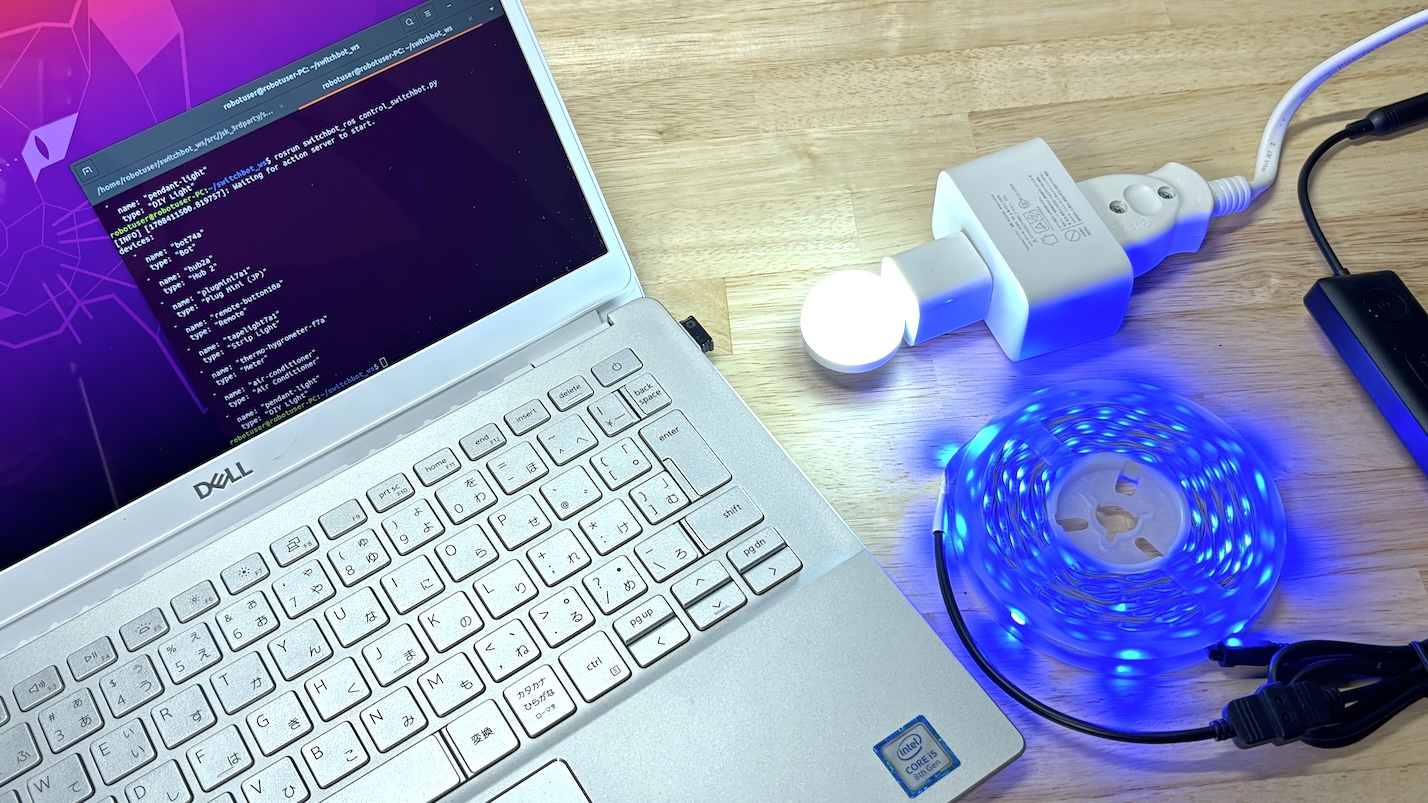
点灯 turnOn,消灯 turnOff,明滅切替 toggle,輝度設定 setBrightness,色設定 setColor の5つのコマンドにより構成されていて,そのうち輝度設定では{1-100} の範囲で輝度設定, "{0-255}:{0-255}:{0-255}" の値で RGB 色設定を行います.
SwitchBot デバイスコマンドのソースコード追記
Plug Mini (JP) を操作するソースコード追記と実行
デバイス名 plugmini7a1 の Plug Mini (JP) を操作します. ROS からコマンドを送って On/Off の切り替え toggle をしてみます.
サンプルコード control_switchbot.py に client.control_device('plugmini7a1', 'toggle') を追加します.(下記ソースコードの 16行目)
control_switchbot.py
#!/usr/bin/env python

import rospy
from switchbot_ros.switchbot_ros_client import SwitchBotROSClient

rospy.init_node('controler_node')
client = SwitchBotROSClient()

devices = client.get_devices()
print(devices)

# client.control_device('pendant-light', 'turnOn')

# client.control_device('bot74a', 'turnOn')

client.control_device('plugmini7a1', 'toggle')
ここでは元々サンプルコードにあったペンダントライトとボット(スイッチ)の操作をする行(上記ソースコードの12,14行目)は行頭に # を入れてコメントアウトして実行されないようにしています.
変更を加えた control_switchbot.py ファイルを保存してから実行します.
ターミナル 1 : switchbot.launch 実行入力
$ source ~/switchbot_ws/devel/setup.bash
$ roslaunch switchbot_ros switchbot.launch token:=YOUR_TOKEN secret:=YOUR_SECRET
ターミナル 2 : control_switchbot.py 実行入力
$ source ~/switchbot_ws/devel/setup.bash
$ rosrun switchbot_ros control_switchbot.py
Strip Light を操作するソースコード追記と実行
デバイス名 tapelight7a1 の Strip Light (テープライト)を操作します. ROS からコマンドを送って次の動作をしてみます.
- 消灯
- 点灯
- 輝度を 100% に設定
- 色を白
'255:255:255'に設定 - 色を赤
'255:0:0'に設定 - 色を緑
'0:255:0'に設定 - 色を青
'0:0:255'に設定 - 輝度を 1% に設定
- 消灯
サンプルコード control_switchbot.py に下記ソースコードの18行目以降を追加します.
値を設定する setBrightness や setColor といったコマンドでは各数値を control_device() の引数 parameter に文字列として渡します.
また control_device() の中ではコマンドを Action サーバにゴールとして送っているので新しいコマンドが前のコマンドに置き換わらないように1つ1つのコマンド実行を終えるのを待つように引数 wait に True を渡しています.
control_switchbot.py
#!/usr/bin/env python

import rospy
from switchbot_ros.switchbot_ros_client import SwitchBotROSClient

rospy.init_node('controler_node')
client = SwitchBotROSClient()

devices = client.get_devices()
print(devices)

# client.control_device('pendant-light', 'turnOn')

# client.control_device('bot74a', 'turnOn')

# client.control_device('plugmini7a1', 'toggle')

client.control_device('tapelight7a1', 'turnOff', wait=True)
client.control_device('tapelight7a1', 'turnOn', wait=True)
client.control_device('tapelight7a1', 'setBrightness', parameter='100', wait=True)
client.control_device('tapelight7a1', 'setColor', parameter='255:255:255', wait=True)
client.control_device('tapelight7a1', 'setColor', parameter='255:0:0', wait=True)
client.control_device('tapelight7a1', 'setColor', parameter='0:255:0', wait=True)
client.control_device('tapelight7a1', 'setColor', parameter='0:0:255', wait=True)
client.control_device('tapelight7a1', 'setBrightness', parameter='1', wait=True)
client.control_device('tapelight7a1', 'turnOff', wait=True)
前述の Plug Mini (JP) のときと同様に変更を加えた control_switchbot.py ファイルを保存してから実行します.
補足ソースコード変更
筆者が試した範囲では時々 client.control_device() が実行されない不具合が見受けられ,それが SwitchBotROSClient インスタンス作成時 client = SwitchBotROSClient() に Action サーバの起動やサーバへの接続が不十分であることが原因のように思われました.
そこで下記の switchbot_ros_client.py の21行目のように self.action_client.wait_for_server() を入れて Action サーバが起動して接続されるのを待つようにしたところ,現状では安定して client.control_device() が実行されているように感じます.
switchbot_ros_client.py
import rospy
import actionlib
from switchbot_ros.msg import SwitchBotCommandAction
from switchbot_ros.msg import SwitchBotCommandGoal
from switchbot_ros.msg import DeviceArray


class SwitchBotROSClient(object):

    def __init__(self,
                 actionname='switchbot_ros/switch',
                 topicname='switchbot_ros/devices'):

        self.actionname = actionname
        self.topicname = topicname
        self.action_client = actionlib.SimpleActionClient(
                actionname,
                SwitchBotCommandAction
                )
        rospy.loginfo("Waiting for action server to start.")
        self.action_client.wait_for_server()

    def get_devices(self, timeout=None):

        return rospy.wait_for_message(
                self.topicname,
                DeviceArray,
                timeout=timeout
                )

    def control_device(self,
                       device_name,
                       command,
                       parameter='',
                       command_type='',
                       wait=False
                       ):

        goal = SwitchBotCommandGoal()
        goal.device_name = device_name
        goal.command = command
        goal.parameter = parameter
        goal.command_type = command_type
        self.action_client.send_goal(goal)
        if wait:
            self.action_client.wait_for_result()
            return self.action_client.get_result()
今回の記事はここまでです.