SwitchBot を ROS から利用する – データ取得編
本シリーズ前回の記事 SwitchBot を ROS から利用する – コマンド操作編2 では SwitchBot を ROS から利用する switchbot_ros のサンプルのソースコードで扱われていた SwitchBot デバイス以外のものを ROS から操作するために SwitchBot API のコマンドセットを調べて control_switchbot.py に実装する過程について紹介しました.
今回は SwitchBot デバイスのステータスデータの取得と ROS トピックへのパブリッシュを行ってみます.
switchbot_ros の更新・ビルド
前回の記事 SwitchBot を ROS から利用する – コマンド操作編2 を公開した後に GitHub 上の switchbot_ros が更新されて SwitchBot デバイスのステータスデータの取得とパブリッシュを行うソフトウェアソースコードが追加されました.
更新された switchbot_ros を実際に動作させる Ubuntu PC 内の switchbot_ros に適用してビルドします.
既に前回の記事の時点の switchbot_ros を含む jsk_3rdparty をクローンして利用している場合は次の手順で更新された GitHub 上の jsk_3rdparty を git でプル(ダウンロード更新)してビルドします.
switchbot_ros を含む jsk_3rdparty の更新とビルド
$ source ~/switchbot_ws/devel/setup.bash
$ cd ~/switchbot_ws/src/jsk_3rdparty
$ git checkout master
$ git pull origin master
$ catkin build
$ source ~/switchbot_ws/devel/setup.bash
利用可能な SwitchBot デバイス名の取得
ターミナル 1 : switchbot_ros の実行
前回記事と同じですがユーザの SwitchBot アカウントで登録されているデバイスの「デバイス名」と「デバイスタイプ」は switchbot.launch を実行すると表示されます.
(下記 launch オプションの YOUR_TOKEN と YOUR_SECRET をそれぞれユーザアカウントのトークンとシークレットに置き換えて実行)
switchbot.launch 実行入力
$ source ~/switchbot_ws/devel/setup.bash
$ roslaunch switchbot_ros switchbot.launch token:=YOUR_TOKEN secret:=YOUR_SECRET
switchbot.launch 実行出力例
... logging to /home/robotuser/.ros/log/87b6e5c8-c1a2-11ee-bce7-1d89a9d14e1f/roslaunch-robotuser-PC-62866.log
Checking log directory for disk usage. This may take a while.
Press Ctrl-C to interrupt
Done checking log file disk usage. Usage is <1GB.

started roslaunch server http://robotuser-PC:40731/

SUMMARY
========

PARAMETERS
 * /rosdistro: noetic
 * /rosversion: 1.16.0
 * /switchbot_ros/secret: (シークレットの上位数桁が表示)...
 * /switchbot_ros/token: (トークンの上位数桁が表示)...

NODES
  /
    switchbot_ros (switchbot_ros/switchbot_ros_server.py)

auto-starting new master
process[master]: started with pid [62874]
ROS_MASTER_URI=http://localhost:11311

setting /run_id to 87b6e5c8-c1a2-11ee-bce7-1d89a9d14e1f
process[rosout-1]: started with pid [62884]
started core service [/rosout]
process[switchbot_ros-2]: started with pid [62891]
[INFO] [1706861436.195243]: Switchbot API Client initialized.
[INFO] [1706861436.199678]: Using SwitchBot API v1.1
[INFO] [1706861436.204957]: Switchbot Device List:
6 Item(s)
deviceName: bot74a, deviceID: (固有のID番号が表示), deviceType: Bot
deviceName: hub2a, deviceID: (固有のID番号が表示), deviceType: Hub 2
deviceName: plugmini7a1, deviceID: (固有のID番号が表示), deviceType: Plug Mini (JP)
deviceName: remote-button10a, deviceID: (固有のID番号が表示), deviceType: Remote
deviceName: tapelight7a1, deviceID: (固有のID番号が表示), deviceType: Strip Light
deviceName: thermo-hygrometer-f7a, deviceID: (固有のID番号が表示), deviceType: Meter

[INFO] [1706861436.208853]: Switchbot Remote List:
2 Item(s)
deviceName: air-conditioner, deviceID: (固有のID番号が表示), remoteType: Air Conditioner
deviceName: pendant-light, deviceID: (固有のID番号が表示), remoteType: DIY Light

[INFO] [1706861436.214168]: Switchbot Scene List:
3 Item(s)
sceneName: turnoff-all-lights, sceneID: (固有のID番号が表示)
sceneName: turnon-all-lights, sceneID: (固有のID番号が表示)
sceneName: turnon-all-lights, sceneID: (固有のID番号が表示)

[INFO] [1706861436.254126]: Ready.
利用可能なデバイス名がコンソール出力されたので一旦 Ctrl-C にて switchbot.launch を終了します.
上記の switchbot.launch 実行出力例にある SwitchBot デバイスのうち取得するステータスがない Remote 以外の次のデバイスタイプは switchbot_ros にてステータスデータを取得することができます.
- Bot
- Hub 2
- Meter
- Plug Mini (JP)
- Strip Light
また上記リスト以外のデータ取得 API 提供がされている SwitchBot デバイスについては switchbot_ros のコードに組み込まれていませんが適宜情報をコードに加えれば switchbot_ros からもデータ取得できるようになると思います.
SwitchBot デバイスのステータスデータの取得と確認
実行例として今回は SwitchBot の温湿度計(デバイスタイプ Meter)のステータスデータを取得してパブリッシュされている ROS トピックを表示してみます.先述の switchbot.launch の実行出力例から読み取ると,該当するデバイス名が thermo-hygrometer-f7a となっています.
ステータスデータを取得する場合は switchbot.launch 実行時に次の2つのオプションを追加します.
pub_status:=trueステータスを取得・パブリッシュを実行するオプション true/falsepub_device_name:=thermo-hygrometer-f7aデバイス名の指定(本例では thermo-hygrometer-f7a)
ターミナル 1 : switchbot_ros の実行
switchbot.launch 実行入力
$ source ~/switchbot_ws/devel/setup.bash
$ roslaunch switchbot_ros switchbot.launch token:=YOUR_TOKEN secret:=YOUR_SECRET pub_status:=true pub_device_name:=thermo-hygrometer-f7a
- 注1) 上記テキストボックスの横スクロールで全 launch オプションが表示されます.
- 注2) 各 launch オプションについて
YOUR_TOKENとYOUR_SECRETは各々の SwitchBot アカウントのトークンとシークレットに置き換えて実行してください.pub_status:=trueでステータスを取得・パブリッシュを実行します.pub_device_name:=thermo-hygrometer-f7aのthermo-hygrometer-f7aは各ユーザ利用のデバイス名に変更してください.
switchbot.launch 実行出力例
... logging to /home/robotuser/.ros/log/81bc64b6-faf2-11ee-8dad-e57ee950b51d/roslaunch-robotuser-PC-28197.log
Checking log directory for disk usage. This may take a while.
Press Ctrl-C to interrupt
Done checking log file disk usage. Usage is <1GB.

started roslaunch server http://robotuser-PC:35371/

SUMMARY
========

PARAMETERS
 * /rosdistro: noetic
 * /rosversion: 1.16.0
 * /switchbot_ros/secret: (シークレットの上位数桁が表示)...
 * /switchbot_ros/token: (トークンの上位数桁が表示)...
 * /switchbot_status_publisher/device_name: thermo-hygrometer...
 * /switchbot_status_publisher/rate: 0.1
 * /switchbot_status_publisher/secret: (シークレットの上位数桁が表示)...
 * /switchbot_status_publisher/token: (トークンの上位数桁が表示)...

NODES
  /
    switchbot_ros (switchbot_ros/switchbot_ros_server.py)
    switchbot_status_publisher (switchbot_ros/switchbot_status_publisher.py)

auto-starting new master
process[master]: started with pid [28205]
ROS_MASTER_URI=http://localhost:11311

setting /run_id to 81bc64b6-faf2-11ee-8dad-e57ee950b51d
process[rosout-1]: started with pid [28215]
started core service [/rosout]
process[switchbot_ros-2]: started with pid [28222]
process[switchbot_status_publisher-3]: started with pid [28223]
[INFO] [1713163000.937913]: Switchbot API Client initialized.
[INFO] [1713163000.938005]: Switchbot API Client initialized.
[INFO] [1713163000.940084]: Using SwitchBot API v1.1
[INFO] [1713163000.940382]: Using SwitchBot API v1.1
[INFO] [1713163000.942545]: Switchbot Device List:
6 Item(s)
deviceName: bot74a, deviceID: (固有のID番号が表示), deviceType: Bot
deviceName: hub2a, deviceID: (固有のID番号が表示), deviceType: Hub 2
deviceName: plugmini7a1, deviceID: (固有のID番号が表示), deviceType: Plug Mini (JP)
deviceName: remote-button10a, deviceID: (固有のID番号が表示), deviceType: Remote
deviceName: tapelight7a1, deviceID: (固有のID番号が表示), deviceType: Strip Light
deviceName: thermo-hygrometer-f7a, deviceID: (固有のID番号が表示), deviceType: Meter

[INFO] [1713163000.944131]: Switchbot Remote List:
2 Item(s)
deviceName: air-conditioner, deviceID: (固有のID番号が表示), remoteType: Air Conditioner
deviceName: pendant-light, deviceID: (固有のID番号が表示), remoteType: DIY Light

[INFO] [1713163000.944268]: Rate: 0.1
[INFO] [1713163000.945732]: Switchbot Scene List:
2 Item(s)
sceneName: turnoff-all-lights, sceneID: (固有のID番号が表示)
sceneName: turnon-all-lights, sceneID: (固有のID番号が表示)

[INFO] [1713163000.947428]: deviceName: thermo-hygrometer-f7a / deviceType: Meter
[INFO] [1713163000.951801]: Ready: SwitchBot Status Publisher for thermo-hygrometer-f7a
[INFO] [1713163000.966800]: Ready.
ターミナル 2 : ROS トピックの確認
rostopic list の実行入力
$ source ~/switchbot_ws/devel/setup.bash
$ rostopic list
rostopic list の実行出力例
/rosout
/rosout_agg
/switchbot_ros/devices
/switchbot_ros/switch/cancel
/switchbot_ros/switch/feedback
/switchbot_ros/switch/goal
/switchbot_ros/switch/result
/switchbot_ros/switch/status
/switchbot_status_publisher/thermo_hygrometer_f7a
rostopic echo 実行入力
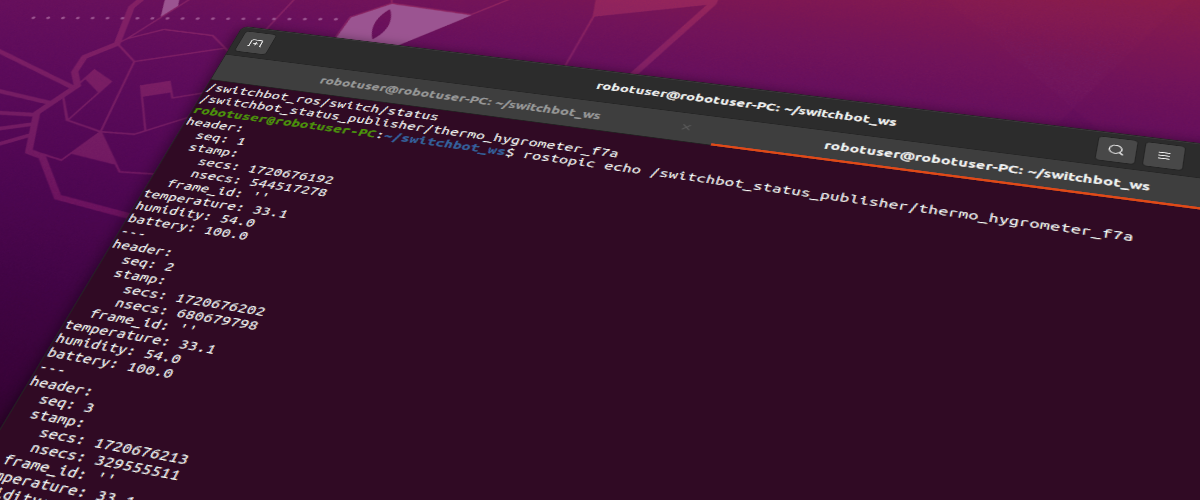
$ rostopic echo /switchbot_status_publisher/thermo_hygrometer_f7a
rostopic echo の実行出力例
header:
  seq: 1
  stamp:
    secs: 1713163093
    nsecs: 412018775
  frame_id: ''
temperature: 26.9
humidity: 36.0
battery: 100.0
---
header:
  seq: 2
  stamp:
    secs: 1713163103
    nsecs: 447003364
  frame_id: ''
temperature: 26.9
humidity: 36.0
battery: 100.0
---
header:
  seq: 3
  stamp:
    secs: 1713163113
    nsecs: 380291700
  frame_id: ''
temperature: 26.9
humidity: 36.0
battery: 100.0
SwitchBot 温湿度計 Meter のステータスデータとして温度・湿度などが取得されて ROS トピックにパブリッシュされている様子がわかるかと思います.
ステータスの取得とパブリッシュの間隔は switchbot.launch のデフォルト設定で 0.1 [Hz] = 10秒間隔 になっています.これを変更する場合には switchbot.launch のオプションで pub_status_rate:=0.05 のように追加します.温湿度のように急に変化しなさそうなデータの場合はもっと長めの間隔でも良いかもしれません.
今回の記事はここまでです.
コメントを投稿するにはログインしてください。

著者について