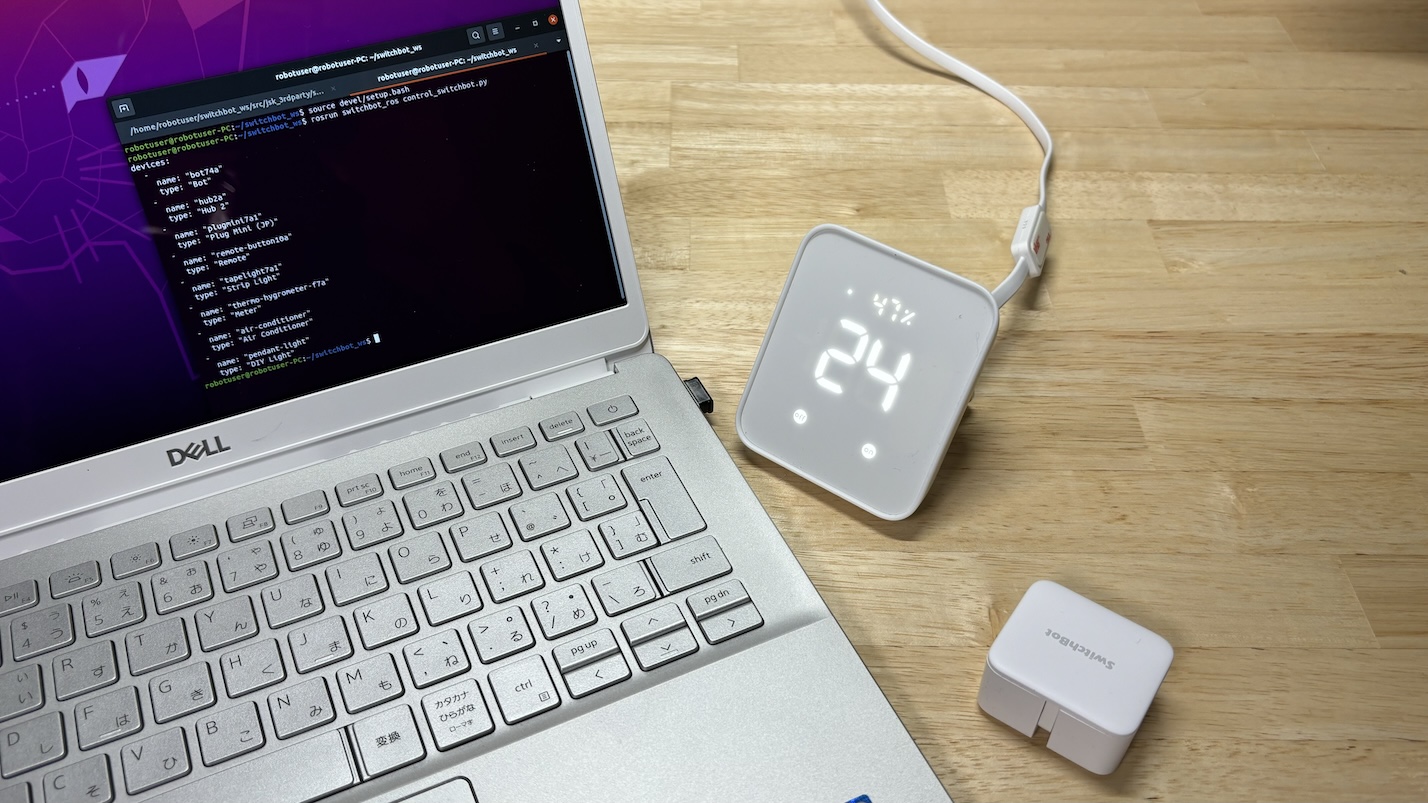
SwitchBot を ROS から利用する – コマンド操作編1
本記事では SwitchBot を ROS から利用できるソフトウェア switchbot_ros の使い方を紹介します.
SwitchBot は多くの IoT スマートホームデバイス製品を提供しているブランドで,既にそれらを日常生活の中で活用されている方も多いのではないでしょうか.
SwitchBot からはソフトウェアインターフェースとして WebAPI が提供されていて,2024年2月はじめの時点での最新バージョンが v1.1 となっています.
SwitchBot の WebAPI を ROS から利用する switchbot_ros は下記のリポジトリで公開されていて SwitchBot API v1.1 にも対応しています.
SwitchBot の機器を ROS のシステムに組み込むことによりロボットとスマートホームデバイスを組み合わせた動作システムを簡単に実現することが可能となります.
今回は switchbot_ros を含む jsk_3rdparty リポジトリを Ubuntu PC 内の ROS ワークスペースにクローン・ビルドして ROS から SwitchBot デバイスを動作させます.
switchbot_ros のビルド
本記事では次の環境で switchbot_ros を利用しています.
- Ubuntu 20.04
- ROS Noetic
Ubuntu や ROS のインストールが済んだ状態で次のように switchbot_ros を利用するためのワークスペースを作成して jsk_3rdparty リポジトリをクローンしてビルドします.
$ source /opt/ros/noetic/setup.bash
$ mkdir -p ~/switchbot_ws/src
$ cd ~/switchbot_ws
$ catkin build
$ source ~/switchbot_ws/devel/setup.bash
$ cd ~/switchbot_ws/src
$ git clone https://github.com/jsk-ros-pkg/jsk_3rdparty.git
$ cd ~/switchbot_ws
$ rosdep install -y -r --from-paths src --ignore-src
$ catkin build
$ source ~/switchbot_ws/devel/setup.bash
SwitchBot API のトークンとシークレットの取得
switchbot_ros は SwitchBot API を利用していますので SwitchBot API にアクセスするための SwitchBot アカウント各々に固有の「トークン(token)」と「シークレット(secret)」の2つの情報が必要になります.
SwitchBot Magazine – 【API】新バージョンAPI v1.1を公開しました にトークンとシークレットの取得方法などが書かれています.この記事から引用・まとめをするとトークンとシークレットの取得方法はつぎのようになっています.
- App Store または Google Play Store より SwitchBot アプリをダウンロード
- SwitchBot アカウントを作成またはサインイン
- オープントークンを生成
- 「プロフィールページ」 → 「設定」へ移動
- 「アプリバージョン」を10回タップ → 「開発者向けオプション」が表示される
- 「開発者向けオプション」をタップ
- 「トークン」と「クライアントシークレット」をコピーしてテキストとして保存
switchbot_ros の実行
switchbot_ros の中にあるコマンドを発する Python コード例 control_switchbot.py を実行して ROS から SwitchBot デバイスのハブの赤外線リモコン発信で部屋の電気を点灯した後にボット(スイッチ)を動作させます.
control_switchbot.py の中身はシンプルで 12行目 で照明を点灯させて,14行目 でボット(スイッチ)を On しています.
control_switchbot.py
#!/usr/bin/env python

import rospy
from switchbot_ros.switchbot_ros_client import SwitchBotROSClient

rospy.init_node('controler_node')
client = SwitchBotROSClient()

devices = client.get_devices()
print(devices)

client.control_device('pendant-light', 'turnOff')

client.control_device('bot74a', 'turnOn')
client.control_device('pendant-light', 'turnOff') で 'turnOff' となっているのに点灯?と思いますが筆者のペンダントライトのリモコンを SwitchBot アプリで登録する際に電源の On/Off ボタンが1つのものとして扱われていて 'turnOn' も 'turnOff' も On/Off の切り替えボタンとして機能してしまっているためです. ( = もう一度 client.control_device('pendant-light', 'turnOff') を実行すると消灯になる) このように特に登録するリモコンについてはどのようにマッピングができたかに挙動が依存するのでコマンドに対する各々のデバイスの挙動を確認してから利用する必要があります.
操作コマンドの SwitchBot デバイスに至るまでの大まかな流れは次のようになっています.
- control_switchbot.py
- → SwitchBot ROS Client
- → SwitchBot ROS Action Server
- → SwitchBot WebAPI
- → SwitchBot デバイス
それでは実際に実行してみます. SwitchBot ROS アクションサーバを起動してから別ターミナルで control_switchbot.py を実行します.
ターミナル 1 : SwitchBot ROS アクションサーバの起動
下記コマンドの SwichBot ROS アクションサーバの起動実行時に launch オプションの token:=YOUR_TOKEN の YOUR_TOKEN を SwitchBot アプリで取得したトークンに置き換えて, secret:=YOUR_SECRET の YOUR_SECRET を取得したシークレットに置き換えて書いて実行します.
switchbot.launch 実行入力
$ source ~/switchbot_ws/devel/setup.bash
$ roslaunch switchbot_ros switchbot.launch token:=YOUR_TOKEN secret:=YOUR_SECRET
switchbot.launch 実行出力例
... logging to /home/robotuser/.ros/log/87b6e5c8-c1a2-11ee-bce7-1d89a9d14e1f/roslaunch-robotuser-PC-62866.log
Checking log directory for disk usage. This may take a while.
Press Ctrl-C to interrupt
Done checking log file disk usage. Usage is <1GB.

started roslaunch server http://robotuser-PC:40731/

SUMMARY
========

PARAMETERS
 * /rosdistro: noetic
 * /rosversion: 1.16.0
 * /switchbot_ros/secret: (シークレットの上位数桁が表示)...
 * /switchbot_ros/token: (トークンの上位数桁が表示)...

NODES
  /
    switchbot_ros (switchbot_ros/switchbot_ros_server.py)

auto-starting new master
process[master]: started with pid [62874]
ROS_MASTER_URI=http://localhost:11311

setting /run_id to 87b6e5c8-c1a2-11ee-bce7-1d89a9d14e1f
process[rosout-1]: started with pid [62884]
started core service [/rosout]
process[switchbot_ros-2]: started with pid [62891]
[INFO] [1706861436.195243]: Switchbot API Client initialized.
[INFO] [1706861436.199678]: Using SwitchBot API v1.1
[INFO] [1706861436.204957]: Switchbot Device List:
6 Item(s)
deviceName: bot74a, deviceID: (固有のID番号が表示), deviceType: Bot
deviceName: hub2a, deviceID: (固有のID番号が表示), deviceType: Hub 2
deviceName: plugmini7a1, deviceID: (固有のID番号が表示), deviceType: Plug Mini (JP)
deviceName: remote-button10a, deviceID: (固有のID番号が表示), deviceType: Remote
deviceName: tapelight7a1, deviceID: (固有のID番号が表示), deviceType: Strip Light
deviceName: thermo-hygrometer-f7a, deviceID: (固有のID番号が表示), deviceType: Meter

[INFO] [1706861436.208853]: Switchbot Remote List:
2 Item(s)
deviceName: air-conditioner, deviceID: (固有のID番号が表示), remoteType: Air Conditioner
deviceName: pendant-light, deviceID: (固有のID番号が表示), remoteType: DIY Light

[INFO] [1706861436.214168]: Switchbot Scene List:
3 Item(s)
sceneName: turnoff-all-lights, sceneID: (固有のID番号が表示)
sceneName: turnon-all-lights, sceneID: (固有のID番号が表示)
sceneName: turnon-all-lights, sceneID: (固有のID番号が表示)

[INFO] [1706861436.254126]: Ready.
ターミナル 2 : control_switchbot.py の実行
ターミナル1 の switchbot.launch を起動したままの状態で別のターミナルで control_switchbot.py を実行します.
control_switchbot.py 実行入力
$ source ~/switchbot_ws/devel/setup.bash
$ rosrun switchbot_ros control_switchbot.py
control_switchbot.py 実行出力例
devices:
  -
    name: "bot74a"
    type: "Bot"
  -
    name: "hub2a"
    type: "None"
  -
    name: "plugmini7a1"
    type: "Plug Mini (JP)"
  -
    name: "remote-button10a"
    type: "Remote"
  -
    name: "tapelight7a1"
    type: "Strip Light"
  -
    name: "thermo-hygrometer-f7a"
    type: "Meter"
  -
    name: "air-conditioner"
    type: "Air Conditioner"
  -
    name: "pendant-light"
    type: "DIY Light"
control_switchbot.py 実行出力時の SwitchBot デバイス動作の様子
SwitchBot を ROS から操作する感じが伝わりましたでしょうか?
今回の記事はここまでです.
本シリーズ次回の記事では今回実行した Python コード例で扱われていたもの以外の SwitchBot デバイスを ROS から操作するために SwitchBot API を調べて control_switchbot.py にコマンドを追加する様子についてお伝えする予定です.
